Winterize your home
This curriculum takes a beginner homeowner from zero knowledge to confident, hands-on mastery of winterizing and weatherproofing. It starts with broad home-repair literacy, moves into energy efficiency and building science, then finishes with advanced envelope sealing and insulation techniques — each stage building the vocabulary and confidence needed for the next.
Foundations: Home Repair Literacy
BeginnerUnderstand how a house is put together, learn basic tool use and repair vocabulary, and gain the confidence to tackle hands-on projects safely.
▸ Study plan for this stage
Pace: 8–10 weeks total. Weeks 1–5: Reader's Digest Complete Do-It-Yourself Manual (~25–30 pages/day, focusing on the structural/systems overviews, tool chapters, and materials sections before diving into project chapters). Weeks 6–10: The Complete Photo Guide to Home Repair by Black & Decker (~20–25 pages
- House anatomy & systems: understanding how framing, sheathing, insulation, roofing, windows, doors, and mechanical systems (plumbing, electrical, HVAC) fit together as an integrated whole — as laid out in the Reader's Digest manual's structural overviews
- Tool identification & safe use: knowing the purpose, correct grip, and safety rules for hand tools (hammers, chisels, utility knives, pry bars) and basic power tools (drills, circular saws, sanders) covered in the Reader's Digest tool chapters
- Materials literacy: recognizing common building materials — lumber dimensions, drywall types, caulks, sealants, fasteners, and weatherstripping — and understanding when each is appropriate, as catalogued in both books
- Reading a repair sequence: using the Black & Decker photo guide's visual step-by-step format to decode what 'before,' 'during,' and 'after' look like for a repair, building the habit of fully reading instructions before touching a tool
- Measuring & marking accurately: mastering the tape measure, speed square, and level — foundational skills emphasized across both manuals before any cutting or fastening begins
- Identifying failure modes: recognizing signs of common household problems (gaps, cracks, rot, moisture intrusion, drafts) using the diagnostic photography in the Black & Decker guide
- Safety & preparation habits: assembling a proper work area, using PPE, understanding when a job requires a licensed professional, and following the safety callouts flagged throughout both books
- Repair vocabulary: internalizing the trade terminology (flashing, jamb, sill, stud, joist, R-value, backer rod, etc.) used consistently across both books so later stages feel immediately accessible
- After reading the Reader's Digest manual's structural sections, can you sketch and label the basic layers of an exterior wall — from interior drywall to exterior cladding — and name the role each layer plays?
- What is the difference between a stud finder and a level, and in what repair scenarios would you reach for each? (Reference the tool chapters in the Reader's Digest manual.)
- Looking at a photo sequence in the Black & Decker guide, can you explain what is happening in each step and why the steps must occur in that specific order?
- What are three visible warning signs of air or moisture infiltration around a window or door, as illustrated in the Black & Decker photo guide's diagnostic sections?
- What does 'R-value' mean, and why does it matter when choosing insulation or weatherstripping materials — as explained in the Reader's Digest manual?
- When should a beginner stop a repair and call a licensed professional? Cite at least two categories of work flagged as professional-only in either book.
- Tool handling walk-through: Gather the hand tools mentioned in the Reader's Digest tool chapters (tape measure, hammer, utility knife, pry bar, level). Practice each one on scrap material — measure and mark a board, drive and pull a nail, score and snap drywall — before attempting any real repair.
- House anatomy tour: Walk every room of your home with the Reader's Digest structural diagrams in hand. Locate and identify at least one example each of: a load-bearing wall, a joist direction, an exterior penetration (pipe or wire), and a visible piece of weatherstripping or caulk joint.
- Vocabulary flashcards: As you read both books, write one index card per unfamiliar term (aim for 40–60 cards total). On the back, write the definition in your own words and a sketch. Quiz yourself weekly.
- Photo-sequence dry run: Choose any 'basic repair' photo sequence from the Black & Decker guide (e.g., patching a small drywall hole or re-caulking a window). Read every step, gather the listed materials, and walk through the motions without starting the actual repair — then do the repair for real.
- Damage inspection log: Do a slow walk around the exterior and interior of your home and photograph every gap, crack, peeling caulk line, or drafty area you find. Cross-reference each finding with the diagnostic photos in the Black & Decker guide to name the problem and note the suggested fix.
- Safety checklist build: Using the safety callouts and 'when to call a pro' sidebars in both books, draft a one-page personal safety checklist covering PPE requirements, tool-storage rules, and a list of job types you will always hire out. Post it in your workspace.
Next up: Mastering house anatomy, tool handling, and repair vocabulary in this stage gives you the structural mental model and hands-on confidence needed to move into targeted winterizing and weatherproofing techniques — where you will apply those same skills specifically to sealing the building envelope against cold, moisture, and energy loss.
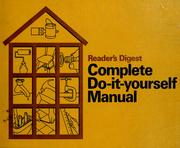
A canonical, heavily illustrated reference that explains how every system in a house works — framing, insulation, windows, doors — giving beginners the vocabulary and visual intuition they need before tackling any weatherproofing task.

Step-by-step photography walks through hundreds of real repairs, including caulking, weatherstripping, and window fixes — the exact micro-skills that underpin winterizing work.
Energy Basics: Where Heat Goes and Why
BeginnerUnderstand heat transfer, air leakage, and moisture movement so every sealing and insulation decision is grounded in building science rather than guesswork.
▸ Study plan for this stage
Pace: 4–5 weeks total: Week 1–2 — Read "The Energy-Smart House" cover to cover (~20–25 pages/day), focusing on whole-house energy flow and building-science fundamentals. Week 3–5 — Read "Insulate and Weatherize" by Bruce Harley (~15–20 pages/day), pausing after each chapter to take notes and connect conce
- The three modes of heat transfer — conduction, convection, and radiation — and how each one drives heat loss through walls, ceilings, floors, and windows
- The concept of the building envelope as a continuous thermal and air barrier, and why gaps in either layer undermine the other
- Stack effect and air pressure dynamics: how warm air rises and escapes at the top of a house while cold air infiltrates at the bottom, creating a year-round energy penalty
- R-value vs. effective R-value: why a nominally rated insulation assembly can perform far below its label value when air movement, thermal bridging, or moisture is present
- Moisture dynamics — vapor diffusion vs. air-transported moisture — and why controlling air leakage matters far more for moisture management than vapor retarders alone (a core lesson in Harley's 'Insulate and Weatherize')
- The house-as-a-system mindset introduced in 'The Energy-Smart House': changes to one component (e.g., sealing the attic) affect ventilation, combustion safety, and indoor air quality elsewhere
- Priority zones for air sealing: attic bypasses, rim joists, and basement/crawlspace interfaces identified by Harley as the highest-impact leakage sites
- The role of a home energy audit — blower-door testing, thermal imaging, and visual inspection — as the diagnostic foundation before any weatherproofing work begins
- After reading 'The Energy-Smart House,' can you explain in plain language why a well-insulated wall can still lose significant heat, and which of the three heat-transfer modes is responsible?
- What is the stack effect, and how does it explain why weatherproofing an attic floor often delivers more savings than sealing windows?
- According to Harley's 'Insulate and Weatherize,' why is air-transported moisture a greater threat to building assemblies than vapor diffusion, and what does that mean for where you put your sealing effort?
- What is thermal bridging, and how does it reduce the effective R-value of a stud-framed wall insulated with fiberglass batts?
- How does tightening a house's envelope change the ventilation and combustion-safety picture, and why must those issues be addressed together rather than separately?
- Which three areas of a typical house does Harley identify as the most cost-effective air-sealing targets, and what physical principle makes each one a priority?
- Draw a cross-section sketch of your own home (or a typical two-story house) and label every location where each of the three heat-transfer modes is the dominant loss mechanism — use 'The Energy-Smart House' diagrams as a reference to check your work.
- Walk through your home with a stick of incense or a smoke pencil on a cold, windy day and map every draft you detect onto a simple floor plan; then categorize each leak by its likely stack-effect role (top-zone exhaust, bottom-zone intake, or mid-zone neutral plane).
- Create a two-column comparison table — one column for vapor diffusion, one for air-transported moisture — listing sources, quantities, and control strategies as described in Harley's 'Insulate and Weatherize'; use this to argue in writing which deserves priority in your climate.
- Calculate the effective R-value of a 2×4 stud wall with R-13 fiberglass batts, accounting for the thermal bridge of studs at 16-inch on-center spacing (studs are roughly R-4.4); compare your result to the nominal R-13 and note the percentage loss.
- After finishing both books, write a one-page 'house diagnosis memo' for your own home (or a hypothetical one) that identifies the top three air-sealing priorities, the insulation gaps, and any moisture risks — citing specific guidance from both 'The Energy-Smart House' and 'Insulate and Weatherize' to justify each recommendation.
- Research whether your local utility offers a free or subsidized blower-door energy audit; schedule one if available, or watch a publicly available blower-door demonstration video and annotate it using the pressure and stack-effect vocabulary from both books.
Next up: Mastering heat transfer, air leakage, and moisture movement in this stage gives you the diagnostic vocabulary and scientific reasoning to evaluate every specific material, product, and installation technique you will encounter in the next stage on hands-on insulation and air-sealing methods — so you can judge not just *how* to apply a solution, but *why* it works and *where* it matters most.

A curated collection of expert articles from Fine Homebuilding magazine that explains insulation, air barriers, and thermal envelopes in plain language — ideal for bridging the gap between basic repair skills and energy thinking.
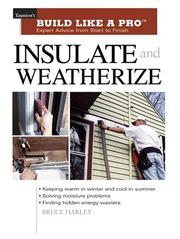
Written specifically for homeowners, this is the most focused and practical book on the subject: it covers air sealing, insulation types, attics, basements, and crawlspaces in exactly the sequence a winterizing project demands.
Hands-On Weatherproofing: Windows, Doors & the Envelope
IntermediateExecute a complete weatherproofing project — sealing air leaks, adding weatherstripping, upgrading windows and doors, and insulating key areas — using proven techniques.
▸ Study plan for this stage
Pace: 2–3 weeks, ~20–25 pages/day — Time-Life's heavily illustrated format rewards slow, deliberate reading; plan extra time to study diagrams and cross-reference techniques before attempting any hands-on work
- The building envelope concept — understanding the home as a continuous thermal and air barrier that must be treated as a system, not a collection of isolated fixes
- Air infiltration vs. heat conduction — distinguishing between drafts (air leaks) and thermal transmission through materials, since each demands a different remedy
- Anatomy of a window and door assembly — jambs, sills, sashes, thresholds, and how gaps form at each junction over time due to settling and wear
- Weatherstripping materials and selection — foam tape, V-strip (tension seal), door sweeps, door shoes, and compression gaskets, matched to the specific movement and wear of each location
- Caulking science and technique — choosing the right caulk compound (silicone, latex, butyl, polyurethane) for each substrate, proper surface prep, bead application, and tooling for a durable seal
- Window upgrades and storm window systems — the role of storm windows and interior window insulation kits in adding an insulating air gap without full replacement
- Insulating key envelope areas — rim joists, attic hatches, and crawl space entry points that Time-Life identifies as disproportionate sources of heat loss
- Systematic leak detection — using the hand-test, incense/smoke pencil, and visual inspection methods described in the book to prioritize where effort yields the greatest return
- According to 'Weatherproofing,' what is the difference between an air leak and a conductive heat loss, and why does that distinction change which repair you perform first?
- What factors — surface material, degree of movement, interior vs. exterior exposure — should guide your choice of caulk compound at a given joint, as outlined in the book?
- Walk through the correct sequence for installing V-strip weatherstripping on a double-hung window sash: what preparation steps does the book specify before the strip is cut and nailed?
- How does the book recommend you detect and rank air infiltration points before beginning repairs, and which areas of the envelope does it flag as highest priority?
- What are the key differences between a door sweep, a door shoe, and a threshold insert, and in what situations does 'Weatherproofing' recommend each?
- After completing all window and door sealing, what envelope areas does the book direct you to address next, and what insulation methods does it describe for those locations?
- Envelope audit walk-through: Before reading past the first chapter, tour your home on a cold or windy day with a lit incense stick or damp hand and mark every draft point on a simple floor-plan sketch — then compare your findings to the priority list in 'Weatherproofing' after you finish the book
- Caulk practice board: Obtain three caulk types covered in the book (e.g., paintable latex, silicone, and polyurethane), run beads on scrap wood or cardboard, practice tooling each one smooth, then observe how they cure and flex — reinforcing the book's material-selection guidance
- Full window weatherstripping project: Select one double-hung window, remove any old weatherstripping, and install new V-strip on the sash channels and a foam or compression strip on the top and bottom rails exactly as illustrated in 'Weatherproofing,' documenting before/after draft tests
- Door threshold and sweep installation: Choose an exterior door with a visible light gap at the bottom, measure and install a door sweep or door shoe following the book's step-by-step instructions, then verify the seal with the paper-slip test described in the text
- Rim joist and attic hatch insulation: Locate your basement rim joist and attic access hatch — two areas specifically highlighted in 'Weatherproofing' — cut and fit rigid foam or batt insulation as the book directs, sealing edges with caulk or spray foam
- Project log and cost-benefit record: For every repair you complete, log the materials used, time spent, and a before/after draft rating (1–5 scale); at the end of the stage, calculate total material cost and estimate annual energy savings using the payback logic the book introduces — building the habit of evaluating weatherproofing decisions quantitatively
Next up: Mastering the window, door, and envelope sealing techniques in this stage creates the airtight shell that makes the next stage — whole-house insulation of walls, attics, and floors — both more effective and easier to measure, since uncontrolled air leaks would otherwise mask the true thermal performance of added insulation.

This Time-Life home repair volume zeroes in on weatherstripping, caulking, storm windows, and door thresholds with clear illustrations — a practical companion to take from the bookshelf directly to the job site.
Advanced Building Science: Whole-House Performance
ExpertThink about the house as an integrated system, diagnose performance problems with diagnostic tools, and apply advanced techniques like continuous air barriers, spray foam, and moisture management.
▸ Study plan for this stage
Pace: 6–8 weeks, ~20–25 pages/day (the Builder's Guide is dense with diagrams and technical details — budget extra time to study each figure carefully and re-read sections on moisture dynamics)
- The house-as-a-system framework: HVAC, envelope, occupants, and site all interact — Lstiburek's core thesis that you cannot optimize one component in isolation
- The Building Science Corporation 'perfect wall, perfect roof, perfect slab' concept: control layers (water, air, vapor, thermal) stacked in the correct order from exterior to interior
- Air barriers vs. vapor retarders: understanding that air movement carries far more moisture than diffusion, and why a continuous air barrier is the primary moisture-control strategy in cold climates
- Thermal bridging and its disproportionate impact on effective R-value — framing, fasteners, and structural members as energy penalties
- Hygrothermal analysis: how temperature and relative humidity gradients drive moisture into and through assemblies, and how to predict condensation risk using dew-point reasoning
- Spray polyurethane foam (open-cell vs. closed-cell): when each is appropriate, their vapor permeance implications, and how they simultaneously address air sealing and insulation
- Mechanical ventilation and combustion safety in tight houses: the interdependence of envelope tightness, indoor air quality, and appliance backdrafting risk
- Diagnostic tools and performance testing: blower-door depressurization, duct blaster testing, and infrared thermography as methods to locate and quantify defects in real assemblies
- According to Lstiburek's systems approach, why is it dangerous to tighten the building envelope without simultaneously addressing mechanical ventilation and combustion appliance venting?
- What are the four control layers Lstiburek identifies for a high-performance wall assembly, in what order should they appear from exterior to interior in a cold climate, and what happens when that order is violated?
- How does air-transported moisture differ from vapor-diffusion moisture in terms of magnitude, and what does this mean for where you should invest your air-sealing effort versus your vapor retarder specification?
- Explain the 'perfect wall' concept: why does moving the insulation to the exterior of the structure reduce thermal bridging and shift the dew point away from vulnerable materials?
- When would Lstiburek recommend closed-cell spray foam over open-cell in a cold-climate roof assembly, and what vapor-permeance threshold drives that decision?
- What blower-door result (ACH50) does Lstiburek target for a well-built cold-climate home, and what field conditions or assembly details most commonly prevent achieving that target?
- Sketch your own home's (or a familiar building's) wall, roof, and slab assemblies from memory, then label each control layer (water, air, vapor, thermal). Compare your sketch against Lstiburek's 'perfect assembly' diagrams and identify every location where your building deviates from the ideal layer order.
- Conduct a DIY blower-door surrogate test: seal all intentional openings (vents, fireplace damper), use a window-fan depressurization setup, and walk the perimeter with a smoke pencil or incense stick to locate air leakage paths. Map every leak on a floor plan and prioritize them by Lstiburek's 'big holes first' hierarchy.
- Perform a dew-point calculation for at least three wall assemblies (e.g., 2×6 fiberglass batt, 2×6 + exterior rigid foam, and double-stud wall) using your local design-temperature data. Determine whether condensation is predicted within the assembly and whether a vapor retarder is required under Lstiburek's criteria.
- Create a thermal-bridging audit of one above-grade wall: count every stud, header, rim joist, and fastener penetration per 100 sq ft of wall, estimate the effective R-value loss using the parallel-path method, and calculate the percentage degradation from the nominal R-value.
- Research and price out two air-barrier strategies for a 1,500 sq ft house — (1) a fluid-applied membrane system and (2) a closed-cell spray foam approach — then write a one-page comparison weighying installed cost, continuity risk, vapor permeance, and compatibility with Lstiburek's recommended layer order.
- Review a set of local building permit drawings (your own project, a neighbor's, or a publicly available set) and annotate where the air barrier is specified, where it is likely to be interrupted, and what details Lstiburek's guide would require to maintain continuity at the top plate, rim joist, window rough openings, and penetrations.
Next up: Mastering Lstiburek's whole-house systems thinking and diagnostic methodology gives you the analytical foundation to move into advanced retrofit and deep-energy upgrade work, where you'll apply these same control-layer and performance-testing principles to existing buildings with all their real-world constraints and compromises.
Lstiburek is the leading authority on building science; this primer explains heat, air, and moisture dynamics at a level that lets the reader understand WHY best practices work, enabling smarter decisions on complex projects.
The definitive technical reference for cold-climate construction and retrofitting — covers vapor control, thermal bridging, and insulation strategies in rigorous detail, completing the learner's journey from basic caulking to whole-house performance.
Discussion
Keep reading
Paths that share books, cover the same subject, or open a related topic.