Compost at home (without the smell)
This curriculum takes a beginner from zero composting knowledge to confident, odor-free practice — covering bin selection, carbon-to-nitrogen balance, troubleshooting smells and pests, and putting finished compost to work in the garden. Each stage builds on the last: Stage 1 establishes the "why" and basic mechanics, Stage 2 deepens the science of balance and troubleshooting, and Stage 3 closes the loop by teaching how to use the finished product effectively.
Foundations: The Basics of Home Composting
BeginnerUnderstand what composting is, why it works, and how to set up a simple odor-free bin at home with the right mix of materials.
▸ Study plan for this stage
Pace: 6–8 weeks total: Weeks 1–3 on "Let It Rot!" (~20–25 pages/day, short sittings), then Weeks 4–7 on "The Complete Compost Gardening Guide" (~25–30 pages/day). Reserve Week 8 for review, reflection, and completing hands-on exercises.
- The decomposition triangle: the roles of nitrogen-rich 'greens' and carbon-rich 'browns,' and why balancing them (roughly 25–30:1 C:N ratio) is the engine of composting — as Campbell explains in 'Let It Rot!'
- The four drivers of decomposition: microorganisms, moisture, oxygen, and particle size — and how managing each one prevents odors and speeds breakdown
- The living workforce: bacteria, fungi, actinomycetes, and macro-organisms (worms, beetles) and their layered roles, introduced by Campbell and expanded in Pleasant's material profiles
- Hot vs. cold (passive) composting: the trade-offs between a fast, pathogen-killing hot pile and a slow, low-effort cold pile, and when each suits a home gardener
- Bin design and siting: how size (minimum 3×3×3 ft), airflow, drainage, and location affect pile performance — drawn from the practical setup guidance in both books
- Troubleshooting the five common problems (bad odors, slimy pile, dry pile, slow breakdown, pests) using the cause-and-fix framework Campbell provides
- Feedstock selection and what NOT to compost: Pleasant's detailed material-by-material guide to what belongs in the bin, what to avoid, and why (meat, dairy, diseased plants, etc.)
- Reading the pile: using temperature, smell, texture, and color as feedback signals to know when to turn, water, or add materials
- After reading 'Let It Rot!', can you explain in plain language WHY a pile heats up, and name the three things you would adjust if it stopped heating?
- What is the C:N ratio, why does it matter, and how would you fix a pile that smells like ammonia vs. one that smells like rotten eggs — using Campbell's diagnostic framework?
- Using Pleasant's feedstock guidance, sort 10 common kitchen and yard items (e.g., coffee grounds, citrus peels, grass clippings, cardboard, wood ash, meat scraps) into 'add freely,' 'add with caution,' and 'never add' categories.
- What are the minimum physical requirements (size, location, airflow) for a functional home compost bin, and how do the two books' recommendations compare?
- Describe the life cycle of a compost pile from fresh inputs to finished compost: what does the material look, smell, and feel like at each stage?
- How does Pleasant's 'compost gardening' framing (composting as a soil-building strategy, not just waste disposal) expand on Campbell's foundational science — and how does that shift your goal as a composter?
- **Start your pile this week:** Using Campbell's greens/browns framework, build or start a bin with at least three alternating layers. Photograph it on Day 1 and log the materials used and their estimated ratio.
- **Keep a compost journal for 4 weeks:** Every 3–4 days, record temperature (use a stick thermometer or your hand), smell, moisture level, and any visible organisms. Note what you added and any adjustments made — this directly practices Campbell's 'reading the pile' method.
- **Conduct a kitchen audit:** For one full week, track every food and organic item you discard. Then, using Pleasant's feedstock guide, categorize each item and calculate what percentage of your household waste could realistically enter the bin.
- **Troubleshoot a simulated problem:** Deliberately make your pile too wet OR too dry for one week, observe the results, then correct it using Campbell's fixes. Write a one-paragraph diagnosis explaining what went wrong and why your fix worked.
- **Material scavenger hunt:** Source at least two 'brown' materials you don't currently use (e.g., cardboard egg cartons, dried leaves, straw, paper bags) and two new 'green' materials (e.g., spent coffee grounds from a café, grass clippings from a neighbor). Add them to your pile and note any changes.
- **Sketch your ideal setup:** After finishing both books, draw or diagram your ideal home composting system — bin type, location, size, and turning schedule — annotated with reasoning drawn specifically from Campbell's science and Pleasant's practical recommendations. Compare it to what you actually built.
Next up: Mastering the biology, balance, and basic management of a single home bin gives you the stable foundation needed to explore more advanced techniques — such as vermicomposting, sheet mulching, and using finished compost strategically in the garden — which build directly on the feedstock knowledge and soil-science principles introduced by Campbell and Pleasant.
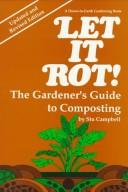
The classic beginner's entry point — plainly explains decomposition, the role of greens and browns, moisture, and aeration in a short, friendly format. Reading this first gives you the vocabulary (C:N ratio, aerobic vs. anaerobic) needed for everything that follows.
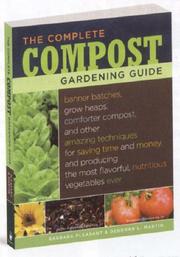
Expands on Campbell's foundations by covering a wide range of composting methods and bin styles, helping beginners choose the right setup for their space and lifestyle — a key decision for odor control.
Balance & Troubleshooting: Keeping It Odor-Free
IntermediateDiagnose and fix common composting problems (odors, slime, pests, slow decomposition) by understanding the biology of balance — carbon, nitrogen, moisture, and airflow.
▸ Study plan for this stage
Pace: 6–8 weeks total: Weeks 1–3 cover "Compost Everything" by David The Good (~20–25 pages/day, reading flexibly around his experimental, low-intervention chapters on troubleshooting diverse materials); Weeks 4–8 cover "The Rodale Book of Composting" by Deborah L. Martin (~25–30 pages/day, reading more m
- The Carbon-to-Nitrogen (C:N) ratio as the master dial of compost health — too much carbon slows decomposition, too much nitrogen causes ammonia odors and slime, and both books frame troubleshooting as restoring this balance
- The four pillars of a functioning pile: carbon materials, nitrogen materials, moisture (~40–60%, the 'wrung sponge' test), and oxygen — understanding how each one going out of range produces a specific, diagnosable symptom
- Microbial succession: bacteria, fungi, and actinomycetes each dominate at different stages and temperatures; Rodale's Book explains how a cold or stalled pile signals a microbial community that has been starved of one of the four pillars
- Odor as a diagnostic language: ammonia smell = excess nitrogen or too wet; rotten-egg (hydrogen sulfide) smell = anaerobic conditions from compaction or waterlogging; no smell at all in a stalled pile = carbon excess or drought
- Pest and vermin management: David The Good's field-tested approach of burying food scraps and using diverse, woody materials contrasts with Rodale's more structured advice on bin design and turning frequency as pest deterrents
- Aeration strategies — passive (structure/bulking agents like wood chips and straw) vs. active (turning schedules) — and how David The Good's 'lazy' low-turn methods still achieve balance through material diversity
- Moisture management: recognizing waterlogged vs. desiccated piles visually and by texture, and the corrective actions each book recommends (adding dry browns vs. watering + shading)
- Slime and matting: caused by layers of wet, fine-particle nitrogen materials (grass clippings, food scraps) clumping together and blocking airflow — both books prescribe interlayering with coarse carbon materials as the fix
- After reading both books, can you look at a pile showing a rotten-egg odor and explain, step by step using the four-pillar framework from Rodale, exactly what has gone wrong biologically and what two or three corrective actions you would take?
- David The Good advocates for minimal turning and highly diverse inputs — how does his approach still maintain C:N balance, and under what conditions does Rodale's Book suggest that a more active turning regimen becomes necessary?
- What specific materials does David The Good identify as surprisingly effective 'problem solvers' for a stalled or smelly pile, and how do these map onto the C:N correction principles laid out in Rodale?
- How do the pest-prevention philosophies of the two books differ, and what practical hybrid strategy could you design for a backyard pile that incorporates both authors' insights?
- Describe the visible and tactile signs of a pile that is too wet, too dry, too nitrogen-heavy, and too carbon-heavy — what does each look and feel like, and what is the first corrective action for each?
- How does microbial succession as described in Rodale's Book explain why a pile can be 'fixed' by a single intervention (e.g., one good turning with added water) rather than requiring a complete rebuild?
- The Diagnosis Journal: For two weeks, visit your compost pile (or a neighbor's/community pile) every 2–3 days and record smell, texture, temperature (even by hand), and visible activity. After finishing both books, go back and annotate each entry with the biological explanation for what you observed.
- The Correction Experiment: Deliberately create a small, imbalanced test pile — one that is clearly too nitrogen-heavy (all grass clippings and food scraps). Document the smell and appearance, then apply the carbon-correction method described in Rodale (layering in dry leaves or cardboard) and track recovery over 10–14 days.
- Material C:N Mapping: Using the C:N ratio tables in Rodale's Book, build a personal reference card of 15–20 materials you actually have access to (your kitchen scraps, yard waste, paper products). Annotate each with David The Good's 'experimental' notes where relevant, and use the card to plan a balanced pile from scratch.
- The Odor Identification Walk: Visit your pile at different times of day and after rain. Practice naming the odor precisely (ammonia, sulfur, earthy, sour, neutral) and writing a one-sentence diagnosis + prescription each time, drawing on the diagnostic frameworks from both books.
- Pest Audit and Redesign: Inspect your bin or pile for signs of pest activity (tunnels, disturbed material, droppings). Using David The Good's burial techniques and Rodale's structural recommendations, sketch a redesigned bin or layering strategy that addresses the specific vulnerabilities you found.
- Side-by-Side Method Comparison: Set up two small piles of identical starting materials — manage one using David The Good's low-intervention, high-diversity approach and the other using Rodale's more structured turning and layering schedule. Photograph and note differences in speed, odor, and texture at weeks 2, 4, and 6.
Next up: Mastering balance and troubleshooting transforms the reader from a passive pile-watcher into an active compost manager, laying the biological and practical foundation needed to tackle the next stage: optimizing finished compost quality and applying it strategically to soil and plants.
Challenges conventional rules and teaches flexible, practical troubleshooting — ideal after you know the basics, because it shows how to adapt when your pile misbehaves without panic.
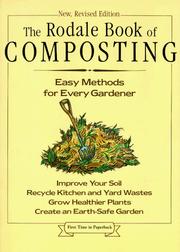
A thorough, science-grounded reference covering the microbiology of decomposition, odor causes, and systematic troubleshooting. Reading it here, after you have hands-on context, makes the deeper science click.
Advanced Practice: Worms, Hot Piles & Precision
ExpertMaster hot composting for speed and pathogen kill, and vermicomposting as a powerful odor-free indoor option — expanding your toolkit well beyond a single backyard bin.
▸ Study plan for this stage
Pace: 2–3 weeks, ~20–25 pages/day — Appelhof's book is concise and highly practical, so a slower, deliberate pace allows time to set up or observe a worm bin in parallel with reading
- Vermicomposting vs. hot composting: understanding that worm bins are a cool, biological, odor-controlled system distinct from thermophilic hot piles — and knowing when to use each
- Worm biology and species selection: why Eisenia fetida (red wigglers) are the workhorse of vermicomposting, their feeding habits, reproduction rates, and environmental tolerances as detailed by Appelhof
- Bin design and sizing: Appelhof's formula for calculating bin surface area based on weekly food waste volume, and the trade-offs between wooden, plastic, and flow-through systems
- Bedding materials and moisture management: the role of carbon-rich bedding (shredded newspaper, cardboard, coco coir) in maintaining the 'wrung-out sponge' moisture level Appelhof prescribes
- Feeding practices and troubleshooting: what to feed, what to avoid, how to bury food correctly, and Appelhof's systematic diagnosis of common problems (odor, fruit flies, worm escapes, protein poisoning)
- Harvesting castings: the migration method, light-separation method, and other techniques Appelhof describes for separating worms from finished vermicompost without losing population
- Hot composting principles (thermophilic composting): achieving and sustaining 131–160°F (55–71°C) core temperatures through C:N ratio management, pile mass, aeration, and moisture — the science behind pathogen and weed-seed destruction
- Expanding the composting toolkit: strategically combining vermicomposting (kitchen scraps, year-round, indoors) with hot composting (yard waste, bulk material, seasonal) for a complete home system
- According to Appelhof, how do you calculate the correct bin size for your household, and what happens if the bin is undersized or oversized relative to food input?
- What environmental conditions — temperature range, moisture level, pH, and aeration — must be maintained for red wigglers to thrive, and what are the warning signs that each parameter is out of range?
- Walk through Appelhof's troubleshooting framework: for each of the three most common worm bin problems (bad odor, worm die-off, pest infestation), what is the likely cause and the corrective action?
- What are the key differences between vermicompost (worm castings) and hot-pile compost in terms of nutrient profile, microbial activity, and best-use applications in the garden?
- How does hot composting achieve pathogen kill and weed-seed destruction, and what pile management steps — turning frequency, moisture checks, temperature monitoring — are required to sustain the thermophilic phase?
- How would you design a two-system composting setup for a household that generates both daily kitchen scraps and seasonal yard waste, drawing on the methods covered in this stage?
- Set up a working worm bin while reading Appelhof: source red wigglers, prepare bedding to her moisture specifications, and document your setup decisions (bin size calculation, bedding choice, location) in a composting journal
- Conduct a two-week feeding log: record every item added to the worm bin (type, weight, burial location), then assess at the end of week two whether the worms are processing material at the expected rate or showing signs of stress
- Run a bin troubleshooting drill: deliberately introduce a mild stressor (slight overfeeding or a borderline food item Appelhof flags) and practice diagnosing and correcting the problem before it becomes severe
- Build or designate a hot compost pile alongside your worm bin: assemble a pile of at least 3×3×3 ft with a target C:N ratio near 30:1, insert a compost thermometer, and log temperatures daily for two weeks to confirm you reach and sustain the thermophilic range
- Perform a castings harvest using at least one of Appelhof's separation methods; weigh the finished vermicompost, note its texture and smell, and apply it to a test container plant — compare growth against an unamended control over four weeks
- Write a one-page 'composting system design' for your own home: specify which materials go to the worm bin vs. the hot pile, the bin/pile specs, a maintenance calendar, and how you will harvest and use each output
Next up: Mastering the biology and precision management of worm bins and hot piles builds the diagnostic mindset and systems-thinking needed to tackle large-scale or community composting methods, soil amendment science, and closing the nutrient loop at the garden or farm level in the next stage.
The definitive guide to vermicomposting — the single most odor-free composting method available. Placed here so readers already understand decomposition biology and can appreciate why worm bins work so differently from hot piles.
A research-based deep dive into thermophilic (hot) composting, microbial succession, and quality testing. It bridges backyard practice with the underlying science, preparing you to optimize any system you run.
Closing the Loop: Using Finished Compost
ExpertUnderstand how to assess compost maturity, apply it correctly to soil and plants, and integrate the whole composting cycle into a productive, regenerative home garden.
▸ Study plan for this stage
Pace: 8–10 weeks total: ~3 weeks on "Teaming with Microbes" (~25–30 pages/day, focusing on Parts I–III covering the soil food web, nutrient cycling, and microbial roles), then ~5–6 weeks on "The Living Soil Handbook" (~20–25 pages/day, reading each crop/practice chapter alongside active garden observation
- Compost maturity indicators: temperature stabilization, earthy smell, dark crumbly texture, and the absence of recognizable feedstock materials — drawn from Lowenfels' explanation of microbial succession and end-stage decomposer activity
- The soil food web as a living system: how bacteria, fungi, nematodes, protozoa, and arthropods form trophic layers that cycle nutrients into plant-available forms, as detailed throughout 'Teaming with Microbes'
- Fungal vs. bacterial dominance: understanding which soil food web balance suits annuals vs. perennials vs. woody plants, and how finished compost can be tuned to favor one over the other (Lowenfels, Part II)
- Nutrient cycling through predator-prey relationships: how protozoa consuming bacteria, and nematodes consuming fungi, release nitrogen and minerals in the root zone — the core mechanism Lowenfels calls 'the lawn-mower effect'
- No-till and minimal-disturbance philosophy: how Jesse Frost's 'The Living Soil Handbook' frames compost application as a surface amendment that feeds soil life from the top down, mimicking natural decomposition
- Compost application rates and timing by crop type: Frost's bed-by-bed guidance on how much compost to apply, when to apply it (pre-planting, side-dressing, post-harvest), and how to match application to plant nutritional needs
- Closing the nutrient loop: integrating kitchen scraps, garden waste, and harvested biomass back into the compost pile so the garden becomes a self-sustaining regenerative system — a theme woven through both books
- Soil observation and assessment as a practice: using sensory evaluation, the jar test, earthworm counts, and plant health as feedback signals to judge whether compost applications are improving soil biology over time (Frost, Chapter on soil health assessment)
- According to Lowenfels in 'Teaming with Microbes,' what biological and physical signs indicate that compost has reached full maturity, and why does microbial succession matter for this determination?
- How does the fungal-to-bacterial ratio in finished compost affect its suitability for different plant types, and what does Lowenfels recommend for matching compost biology to garden beds planted with annuals versus perennials or shrubs?
- What does Jesse Frost mean by 'feeding the soil, not the plant' in 'The Living Soil Handbook,' and how does surface-applied compost support this philosophy compared to tilling amendments into the soil?
- Using Frost's guidance in 'The Living Soil Handbook,' how would you determine the correct compost application rate and timing for a bed of heavy-feeding brassicas versus a bed of root vegetables?
- How do the predator-prey relationships described by Lowenfels (e.g., protozoa eating bacteria) translate into practical nutrient availability for plants, and what role does finished compost play in seeding these relationships into depleted soil?
- Drawing on both books, how would you design a whole-garden composting cycle — from kitchen scraps and crop residues back to finished compost and soil application — that minimizes external inputs and maximizes regenerative output?
- Compost maturity audit: Take a sample from your current pile and run a 3-part test — the bag test (seal in a plastic bag for 3 days and smell for ammonia or sourness), a germination test (plant 10 radish seeds in pure compost vs. potting mix and compare germination rates at 5 days), and a visual inspection using Lowenfels' maturity criteria. Document your findings in a compost journal.
- Soil food web mapping: After finishing 'Teaming with Microbes,' draw a hand-labeled diagram of the soil food web from memory, including at least 4 trophic levels. Annotate each organism with its role in nutrient cycling and note which ones are most abundant in well-finished compost.
- Fungal vs. bacterial compost experiment: Create two small test batches — one with a higher carbon-to-nitrogen ratio and more woody/straw material (fungal-leaning) and one with more green nitrogen-rich inputs (bacterial-leaning). Apply each to a different bed type as Lowenfels recommends and observe plant response over 4–6 weeks.
- Bed-by-bed application log: Using Frost's crop-specific guidance from 'The Living Soil Handbook,' create a written application plan for every active bed in your garden. Record the compost source, application rate, method (top-dress, incorporation, compost tea), and target crop. Revisit and compare plant health at 3 and 6 weeks.
- Earthworm and organism count: Before and 4 weeks after applying finished compost to a bed, conduct a 12-inch-deep, 1-square-foot soil sample count of visible organisms (earthworms, beetles, millipedes). Track changes as a proxy for improving soil food web activity, connecting your data to Lowenfels' food web principles.
- Regenerative loop design: Draft a one-page diagram or flowchart of your home composting cycle from input (kitchen scraps, garden trimmings, cover crop biomass) through decomposition stages to finished compost application and back to harvest. Identify any 'leaks' in the loop (e.g., inputs being thrown away, nutrients leaving the system) and write a one-paragraph plan to close them, drawing on strat
Next up: Mastering compost maturity and soil food web dynamics in this stage gives the reader the biological literacy and hands-on feedback skills needed to tackle more advanced topics — such as cover cropping, green manures, and whole-farm nutrient planning — where the same regenerative principles operate at a larger and more complex scale.

Explains the soil food web in depth, showing exactly why finished compost is so valuable and how to apply it to feed soil life rather than just plants. This is the payoff book — all your composting effort finally makes biological sense.

A practical, market-gardener-tested guide to building soil with compost, mulch, and cover crops. It translates the science from Lowenfels into actionable techniques for beds, containers, and lawns — the perfect capstone.
Discussion
Keep reading
Paths that share books, cover the same subject, or open a related topic.