Turn your garage into a real workshop
This curriculum takes a beginner from "cluttered garage" to "functional shop" by building in three layers: first, the mindset and principles of organized spaces; second, the practical craft of shop layout, storage, and workbench building; and third, the advanced workflow thinking used by professional woodworkers and makers to optimize a working shop. Each stage assumes the vocabulary and habits built in the one before it.
Foundations: Organizing Mindset & Space Principles
BeginnerUnderstand the core principles of decluttering, categorizing, and designing functional storage systems before touching a single shelf bracket.
▸ Study plan for this stage
Pace: 4–5 weeks total: Week 1–2 — Read "The Life-Changing Magic of Tidying Up" (~20–25 pages/day, including reflection time); Week 3–4 — Read "Organize Now!" (~15–20 pages/day, working through one weekly action plan per sitting); Week 5 — Review notes, complete remaining exercises, and do a full garage wa
- The KonMari 'spark joy' decision-making filter — evaluating every garage item by whether it has genuine utility or emotional value, not just habit or guilt
- Tidying by category, not by location — Kondo's insistence on gathering all items of one type together before sorting, applied to garage categories like tools, sports gear, and automotive supplies
- Discarding before organizing — both Kondo and Berry emphasize that storage solutions should only be designed AFTER the total volume of kept items is known
- Designating a 'home' for every item — the principle that clutter is simply objects without an assigned place, central to Berry's weekly action plans
- Berry's weekly action-plan structure — breaking an overwhelming space into small, time-boxed tasks to build momentum and avoid burnout
- Zones and functional groupings — designing storage around how you actually USE the garage (workshop zone, sports zone, automotive zone, seasonal zone) rather than arbitrary shelf assignments
- The psychological relationship with stuff — Kondo's framing of clutter as unfinished decisions, and Berry's emphasis on mindset as the prerequisite to any physical organizing
- Sustainability over perfection — Berry's recurring theme that a 'good enough' system you maintain beats a perfect system you abandon
- According to Kondo, why must you discard completely before you begin organizing, and how does this principle apply specifically to a garage full of tools and hardware?
- How does the KonMari category-based approach (rather than room-by-room) change the way you would tackle a garage that also stores items from other areas of the home?
- What is Berry's weekly action-plan method, and how does breaking the garage into small time-boxed sessions address the psychological barrier of feeling overwhelmed?
- Both authors stress mindset before mechanics — what specific mental shifts do Kondo and Berry each say must happen before physical organizing can succeed?
- How would you define and map out functional zones in a typical two-car garage using the principles from these two books combined?
- What criteria would you use — drawing from both Kondo's 'spark joy' test and Berry's utility-focused checklists — to decide whether to keep, donate, or discard a broken power tool you haven't used in three years?
- Category Audit Walk-Through: Before touching anything, walk through your garage and list every broad category present (e.g., hand tools, power tools, sports equipment, holiday décor, automotive). Compare your list to Kondo's recommended category sequence and draft the order in which you will tackle them.
- The 'Spark Joy' Stress Test: Choose one small, manageable category (e.g., a single drawer of miscellaneous hardware or a bin of sporting goods). Apply Kondo's hold-each-item method and make a keep/discard decision for every piece. Notice which decisions feel easy and which feel guilty — journal two sentences on what that reveals about your relationship with your stuff.
- Berry Weekly Plan Draft: Using Berry's action-plan format, write a realistic 4-week mini-plan for just ONE zone of your garage (e.g., the workbench area). Assign specific tasks to specific days, cap each session at 30–45 minutes, and include a 'maintenance' check at the end of week 4.
- Zone Mapping on Paper: Sketch a rough floor plan of your garage. Using the functional-zone concept from Berry, draw and label proposed zones based on activity (workshop, lawn & garden, sports, automotive, seasonal storage). Identify which zones conflict with each other and propose one layout adjustment to reduce friction.
- Discard-First Dry Run: Set a timer for 20 minutes and remove from the garage every item that is obviously broken, duplicated, or hasn't been touched in over two years. Count the items. Reflect in writing on how this changes your perception of available space — before building any shelves or buying any bins.
- Concept Synthesis Journal Entry: After finishing both books, write a one-page personal 'organizing philosophy' for your garage that blends Kondo's mindset principles with Berry's action-oriented structure. This document will serve as your north star for all physical work in later stages.
Next up: Completing this stage gives you a decluttered, zoned, and philosophically grounded garage canvas — the exact clean-slate prerequisite for the next stage, which moves from mindset into the practical mechanics of shelving systems, wall storage hardware, and spatial layout design.

Establishes the foundational habit of ruthless decluttering and category-based sorting — essential before designing any storage system. Reading this first prevents the classic mistake of organizing junk instead of eliminating it.

Bridges the gap between general decluttering philosophy and room-by-room practical action, including utility and garage spaces. It gives beginners a concrete, week-by-week framework to act on Kondo's mindset.
Shop Layout & Storage Systems
BeginnerPlan a safe, efficient garage shop layout, choose the right storage solutions, and understand workflow zones (parking, tools, workbench, materials).
▸ Study plan for this stage
Pace: 3–4 weeks, ~20–25 pages/day; read actively with a notepad and tape measure nearby — Stankus is highly visual and practical, so pause frequently to sketch or measure your own space as you go.
- Workflow zones: Stankus breaks a shop into distinct functional areas (parking/entry, workbench zone, tool zone, materials/lumber storage) — understanding how these zones interact is the book's central organizing idea.
- Traffic flow & clearance: Stankus emphasizes minimum clearance distances around stationary tools and workbenches so you can move safely with long boards or sheet goods.
- The workbench as the shop's anchor: Stankus treats the workbench as the gravitational center of the layout — its placement determines where everything else goes.
- Vertical vs. floor storage: Stankus advocates maximizing wall and ceiling storage (pegboards, wall-mounted cabinets, overhead lumber racks) to keep the floor clear for movement and safety.
- Electrical & lighting planning: Stankus covers outlet placement, circuit load basics, and task lighting as non-negotiable parts of layout planning, not afterthoughts.
- Dust and chip management zones: Stankus integrates dust collection routing into the layout plan from the start, showing how tool placement affects hose runs and air quality.
- Scalability & flexibility: Stankus designs layouts that can grow — using mobile tool bases and modular storage so the shop evolves without a full reorganization.
- Safety-first layout principles: Stankus weaves fire safety (extinguisher placement, finishing area separation), emergency egress, and first-aid station location into every layout discussion.
- According to Stankus, what are the primary workflow zones in a garage shop, and why must their sequence follow the natural flow of a project from raw material to finished piece?
- What minimum clearance distances does Stankus recommend around a table saw or workbench, and how do those numbers change the usable square footage of a small garage?
- How does Stankus justify placing the workbench before deciding where stationary power tools go — what is his reasoning for this sequencing?
- What wall- and ceiling-storage strategies does Stankus recommend for a one- or two-car garage, and which does he consider most space-efficient for hand tools vs. lumber?
- How does Stankus integrate dust collection and electrical planning into the layout process, and what mistakes does he warn against when these are treated as add-ons?
- What safety elements (egress, fire suppression, first aid) does Stankus say must be fixed points in any layout plan, and how do they constrain other decisions?
- Sketch your actual garage to scale (graph paper or free tools like RoomSketcher): mark doors, windows, electrical panels, and existing outlets before reading each layout chapter, then update the sketch as Stankus introduces each zone.
- Zone audit walk-through: using Stankus's zone definitions, walk your garage and physically tape off areas on the floor for parking, workbench, tools, and materials — photograph it and compare it to his recommended proportions.
- Clearance test: place your largest tool (or a cardboard stand-in) in three different positions and use a tape measure to verify Stankus's minimum clearances on all four sides; note which positions are actually viable.
- Wall-storage inventory: list every hand tool you own, categorize it by Stankus's storage type (pegboard, drawer, cabinet, rack), and plan one wall section using his recommendations — price out the materials.
- Electrical & lighting audit: count your current outlets and overhead lights, map them on your sketch, then use Stankus's guidelines to identify gaps — mark where you'd add circuits or task lights and estimate the cost.
- Safety checklist: using Stankus's safety layout principles, create a one-page checklist (egress path, extinguisher, first-aid kit, finishing area separation) and physically verify each item in your space, noting what needs to change.
Next up: Stankus gives you the spatial blueprint and storage logic for a beginner shop; the next stage builds on that foundation by introducing tool selection and acquisition, so you'll know exactly which tools to buy and where — per your already-planned layout — they will live and operate safely.
Safety and spatial awareness come before building anything. This book establishes how tool placement, clearances, and traffic flow directly affect shop layout decisions.

A practical, beginner-friendly guide to planning a real shop in a real garage — covers zoning, lighting, electrical, and storage with clear diagrams. Read after safety fundamentals are in place.
The Workbench: Your Shop's Command Center
IntermediateDesign and build a workbench tailored to your workflow, understanding how bench height, vises, and tool storage around the bench define shop efficiency.
▸ Study plan for this stage
Pace: 6–8 weeks total: Weeks 1–3 cover "The Workbench Book" by Scott Landis (~20–25 pages/day, including time to study the bench profiles and photographs carefully); Weeks 4–6 cover "Workbenches" by Christopher Schwarz (~20–25 pages/day, with slower reading during the joinery and build chapters); Weeks 7–
- Bench height ergonomics: how your height and primary tasks (hand-tool vs. power-tool work) dictate the ideal bench surface height, as explored through the diverse bench profiles in Landis's survey
- The anatomy of a workbench: legs, stretchers, top (thickness and species), tail vise, face vise, and dog holes — and how each component contributes to holding work securely
- Historical and cultural bench traditions: Landis's documentation of European (Roubo, Nicholson, Scandinavian) and American vernacular benches reveals how design choices evolved from real workflow needs
- Vise selection and placement: Schwarz's detailed analysis of face vises, leg vises, tail vises, and wagon vises — their strengths, weaknesses, and the work-holding scenarios each excels at
- Schwarz's two archetypal bench designs (the French Roubo and the English Nicholson) as practical frameworks for choosing a bench philosophy that matches your shop and skill level
- Work-holding without a vise: holdfasts, bench dogs, planing stops, and crochet hooks as force-multiplying accessories that Schwarz treats as integral to bench design, not afterthoughts
- Material and construction decisions: wood species selection, top lamination strategies, base joinery (drawbored mortise-and-tenon vs. trestle), and how Schwarz's build sequences make these choices concrete
- Bench placement and shop layout: orienting the bench relative to light sources and workflow paths so the bench truly functions as the shop's command center
- After reading Landis, can you describe at least three distinct bench traditions and explain one design feature from each that you would or would not incorporate into your own bench — and why?
- What is the relationship between bench height and the type of work being done, and how would you determine the correct height for your own body and workflow?
- Schwarz argues that the Roubo and Nicholson represent two fundamentally different philosophies of work-holding — what are those philosophies, and which bench type is better suited to predominantly hand-tool work versus assembly-heavy work?
- What are the trade-offs between a leg vise and a face vise in terms of clamping pressure, jaw width, and the types of workpieces each handles best, according to Schwarz?
- How do bench dogs and holdfasts extend the work-holding capability of a bench, and what design features (dog-hole spacing, holdfast collar diameter, top thickness) must be planned into the bench from the start to support them?
- If you had a 10×12 ft one-car garage shop, how would you use the principles from both books to decide on bench dimensions, orientation, and the placement of tool storage around the bench?
- Measure and record your ideal bench height: stand relaxed, measure from the floor to your palm crease, then adjust ±2 inches based on whether you do more hand-planing (lower) or layout/assembly (higher). Document your reasoning in a shop notebook.
- Create a 'bench profile' sketch in the style of Landis's survey drawings — top view, front elevation, and end elevation — for your dream bench, labeling every major component (top thickness, vise type and placement, dog-hole row, shelf or lower stretchers).
- Build a full-scale mock-up of your planned bench height and footprint using sawhorses, plywood, and scrap lumber. Work at it for a full shop session doing your most common tasks, then adjust and document what felt right or wrong.
- Following Schwarz's material guidance, visit a lumber yard and price out two top options (e.g., hard maple lamination vs. construction-grade Douglas fir) for your bench top; calculate board-feet needed and compare cost, availability, and workability in a written comparison.
- Practice the two primary work-holding setups Schwarz demonstrates — face-vise + bench dog and holdfast on a thick plank — using whatever bench you currently own or a temporary surface, and note which operations feel limited by your current setup.
- Draft a to-scale shop-layout diagram (graph paper or free software like SketchUp) placing your planned bench relative to windows, the garage door, and your major stationary tools, using the light and workflow principles discussed in both books.
Next up: Mastering the workbench as a fixed, purpose-built command center naturally raises the question of how to organize everything around it — wall space, overhead storage, mobile carts, and zone-based tool placement — which is precisely what the next stage on broader shop storage systems will address.
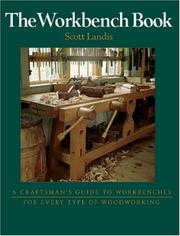
The canonical reference on workbench design — surveys dozens of bench styles and explains the ergonomic and workflow reasoning behind each choice. Gives the reader a rich vocabulary before committing to a build.

The modern standard for actually building a bench, with deep reasoning about height, vise placement, and how the bench anchors the entire shop layout. Read after Landis to move from survey to decision.
Advanced Shop Workflow & Optimization
ExpertThink like a professional about material flow, tool sequencing, dust collection, and iterative shop improvement so the space continuously evolves with your skills.
▸ Study plan for this stage
Pace: 6–8 weeks total: Weeks 1–4 on "The Complete Manual of Woodworking" (~25–30 pages/day, focusing on process chapters, joinery sequences, and finishing workflows); Weeks 5–8 on "Shop Class as Soulcraft" (~15–20 pages/day, reading more slowly and reflectively, journaling after each chapter)
- Material flow & sequencing: Jackson's manual reveals how a professional woodworking shop is implicitly organized around the logical progression of raw stock → dimensioning → joinery → assembly → finishing, and recognizing this flow is the foundation of advanced layout decisions
- Tool hierarchy & operational order: Jackson demonstrates that tools are not used randomly but in a deliberate sequence (e.g., ripping before crosscutting, flattening before thicknessing), and mapping this sequence onto your physical shop reduces wasted motion
- Dust collection as a workflow constraint: Jackson's coverage of machines and their dust-producing operations makes clear that dust collection routing must be planned around tool-use frequency and proximity, not afterthought
- Iterative shop improvement: Both books together reinforce that a shop is never 'finished' — Jackson provides the technical benchmarks (flat benches, sharp tools, calibrated machines) while Crawford provides the philosophical framework for why continuous refinement is meaningful work in itself
- Tacit knowledge vs. explicit knowledge: Crawford's central argument — that manual trades encode knowledge that cannot be fully written down — reframes how you read Jackson's manual: the diagrams and instructions are starting points, not complete answers
- The ethics and dignity of skilled craft: Crawford's 'Shop Class as Soulcraft' argues that engagement with resistant physical materials builds genuine cognitive and moral virtues, elevating shop optimization from mere efficiency-seeking to a practice of self-development
- Troubleshooting as diagnosis: Crawford's motorcycle repair lens teaches the advanced woodworker to treat shop problems (tearout, misalignment, poor fits) as diagnostic puzzles requiring systematic reasoning, not just trial and error
- Workflow as a reflection of values: Synthesizing both books, the arrangement of your shop — what is at hand, what is stored away, what is given prime real estate — is a statement about what kind of work you prioritize and who you are becoming as a craftsperson
- After studying Jackson's sequencing of machine and hand-tool operations, can you draw a material-flow diagram of your own shop that traces a board from rough lumber to finished part, identifying every bottleneck or backtrack in the current layout?
- Jackson details the setup and calibration requirements of major stationary machines — what is the correct sequence for introducing a rough board to the jointer, planer, table saw, and router table, and how should their physical positions in the shop reflect that sequence?
- Crawford argues that 'thinking' and 'doing' are falsely separated in modern culture — how does this thesis change the way you approach reading a technical reference like Jackson's manual, and what does it imply about the limits of any written shop guide?
- Based on Crawford's concept of 'stochastic' engagement with resistant materials, how should an advanced woodworker respond when a technique from Jackson's manual produces unexpected results — what is the diagnostic process?
- How do the dust-collection and ventilation considerations implied throughout Jackson's machine chapters translate into concrete shop layout rules (zones, ducting priority, machine clustering)?
- Crawford describes the satisfaction of work that 'resists' the worker as central to meaningful craft — how can you design your shop improvement process so that it retains this quality of genuine challenge rather than becoming a consumerist upgrade cycle?
- Material-flow audit: Walk your shop with Jackson's operational sequence in hand (rough milling → joinery → assembly → finishing) and physically mark with tape or sticky notes every place you must carry material 'upstream' against the logical flow. Redesign at least one zone to eliminate the worst backtrack.
- Machine calibration sprint: Using Jackson's specifications as benchmarks, spend one dedicated session checking and correcting the fence parallelism, blade/cutter squareness, and table flatness of every stationary machine you own. Document before/after measurements in a shop notebook.
- Dust-collection mapping: Draw a top-down plan of your shop and annotate each machine with its dust-collection demand (high/medium/low) and frequency of use. Design or redesign your ducting layout to serve the highest-demand, most-used machines with the shortest, straightest runs.
- Crawford reflection journal: After each chapter of 'Shop Class as Soulcraft', write a half-page entry connecting Crawford's philosophical point to a specific, concrete experience you have had in your own shop — a tool that humbled you, a joint that taught you something, a moment of genuine diagnostic satisfaction.
- Iterative improvement log: Start a 'shop changelog' (a physical notebook or digital doc) modeled on software version control. Each time you move a tool, add storage, or change a workflow, record the problem it solved, the solution tried, and the result after one week of use — building a living document of your shop's evolution.
- Tacit-knowledge translation exercise: Choose one technique from Jackson's manual that you have read but not yet mastered (e.g., cutting a hand-cut dovetail, setting a hand plane for a gossamer shaving). Practice it until you can identify at least three things the manual does NOT tell you — knowledge you only gained through doing — and write them down as annotations in the margin or a companion not
Next up: By internalizing both the technical sequencing logic from Jackson and the philosophical framework for continuous, meaningful refinement from Crawford, the reader is now equipped to approach any new domain of making — whether finishing, furniture design, or shop expansion — not as a beginner collecting tips, but as a reflective practitioner who can diagnose problems, design systems, and grow delibe

A comprehensive reference that recontextualizes every storage and layout decision around actual craft processes — understanding how work flows through operations clarifies where every tool and material should live.

A philosophical and practical meditation on the relationship between the craftsman and their workspace. Read last to internalize why a well-organized shop is not just efficient but deeply meaningful — it sustains long-term engagement with the craft.
Discussion
Keep reading
Paths that share books, cover the same subject, or open a related topic.