Embroidery, stitch by stitch
This curriculum takes a complete beginner from their very first stitch to designing and executing original embroidery and cross-stitch work. Each stage builds on the last — starting with essential hand skills and vocabulary, moving through classic sampler traditions, then into advanced techniques and finally into the creative freedom of designing your own pieces.
First Stitches: Foundations
BeginnerLearn to thread a needle, use a hoop, and execute the core stitches (running, backstitch, satin, chain, cross-stitch) with confidence and good tension.
▸ Study plan for this stage
Pace: 3–4 weeks, ~15–20 pages/day; Chanin's book is visually rich and technique-dense, so allow extra time to pause, re-read diagrams, and practice each stitch at the needle before moving on.
- Threading a needle and knotting thread correctly, as demonstrated in Chanin's step-by-step hand-sewing instructions
- Proper hoop setup and fabric tension — keeping fabric drum-tight without distorting the weave
- The running stitch as the foundational unit of hand-sewing, including Chanin's emphasis on stitch length consistency and rhythm
- The backstitch and its role in creating strong, continuous lines — Chanin frames it as the backbone of structural hand-sewing
- Satin stitch technique: filling shapes with smooth, parallel stitches and managing thread coverage without bulk
- The chain stitch: forming interlocking loops and maintaining even loop size across a line or curve
- The cross-stitch: understanding the geometry of the X, consistent stitch direction, and counted-thread placement
- Thread tension and 'hand' — Chanin's core philosophy that good tension comes from feel and repetition, not mechanical force
- According to Chanin's instructions, what is the correct way to thread and knot a needle to prevent the thread from pulling through fabric?
- How does Chanin describe setting up a hoop, and what signs indicate that your fabric tension is correct versus too tight or too loose?
- What distinguishes a running stitch from a backstitch in terms of structure and use-case, as explained in The Geometry of Hand-Sewing?
- How does Chanin's geometric framework help you understand the construction of the satin stitch — specifically how angle and stitch direction affect the finished surface?
- What does Chanin mean by the 'geometry' of hand-sewing, and how does this concept apply to executing a chain stitch with consistent loop size?
- After working through Chanin's exercises, how would you self-diagnose and correct uneven tension in your cross-stitches?
- Thread & Knot Drill: Practice threading a needle and forming a waste knot and an away knot 10 times each until the motion is automatic — no looking at instructions.
- Tension Sampler: Mount a 6-inch square of even-weave fabric in your hoop and stitch a 2-inch line in each of the five core stitches (running, backstitch, satin, chain, cross-stitch). Hold it up to the light to check for puckering or loose loops.
- Geometry Grid Exercise: Draw a 1-inch grid lightly on fabric with a water-soluble pen and use it as a guide to practice perfectly even running stitches and cross-stitches, reinforcing Chanin's geometric approach.
- Stitch-Length Consistency Test: Stitch three parallel rows of running stitch aiming for 1/8", 1/4", and 3/8" stitch lengths respectively; measure with a ruler and note where your rhythm drifts.
- Shape-Fill Challenge: Draw a simple leaf or petal shape (about 1.5 inches) and fill it entirely with satin stitch, focusing on smooth parallel coverage and clean edges as Chanin describes.
- Stitch Journal: After each reading session, sketch the stitch diagrams from Chanin's book by hand in a notebook and annotate them with your own observations from practice — this reinforces the geometric logic of each stitch.
Next up: Mastering these five core stitches and internalizing Chanin's geometric framework gives you the technical vocabulary and muscle memory needed to tackle more complex stitch combinations, decorative patterns, and project-based work in the next stage.
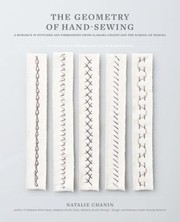
Demystifies how stitches relate to fabric grain and structure, giving beginners the spatial intuition needed before tackling counted work like cross-stitch.
The Sampler Tradition: Cross-Stitch Fundamentals
BeginnerComplete counted cross-stitch samplers, read charts fluently, and understand the historical sampler tradition that underpins the craft.
▸ Study plan for this stage
Pace: 8–10 weeks total. Weeks 1–6: Jane Greenoff's "The New Cross Stitchers Bible" (~20–25 pages/day, 4–5 days/week), working through techniques chapter by chapter and pausing to stitch alongside each section. Weeks 7–10: "A-Z of Embroidery Stitches" by Country Bumpkin Publications (used as a reference co
- Counted cross-stitch fundamentals: how to read a charted grid, match symbols to thread colors, and translate chart squares to fabric weave
- Fabric selection and thread counts: understanding Aida, evenweave, and linen, and how fabric count (14-count, 28-count, etc.) determines stitch size and project scale
- The historical sampler tradition: the role of samplers as teaching tools from the 16th century onward, alphabet and motif conventions, and how Greenoff contextualizes modern practice within this heritage
- Starting, finishing, and managing threads: waste knots, away waste knots, loop starts, and securing thread ends without knots on the back
- The full cross-stitch and its variations: three-quarter stitch, quarter stitch, half stitch, and back stitch outlines as taught in Greenoff's technique chapters
- Back stitch, running stitch, and specialty counted-thread stitches introduced in the A-Z of Embroidery Stitches that complement and extend a cross-stitch sampler
- Color theory and thread palette building: DMC/Anchor color systems, using the key on a chart, and blending threads for shading effects
- Tension, consistent stitch direction, and finishing techniques: pressing, mounting, and framing a completed sampler
- After reading Greenoff, can you explain the difference between Aida and evenweave fabric, and describe when you would choose one over the other for a sampler project?
- How do you locate your starting point on a blank piece of fabric using a chart, and why does centering matter for a sampler composition?
- What is the historical significance of the sampler tradition as described by Greenoff, and how did samplers function as both learning tools and personal records?
- From the A-Z of Embroidery Stitches, what distinguishes a back stitch outline from a stem stitch outline, and how would each change the look of lettering on a sampler?
- How do you handle thread tension and stitch direction consistency across a large counted piece, and what problems arise when these are ignored?
- Using both books together, how would you plan a small original sampler — selecting fabric count, choosing a thread palette, mapping a chart, and deciding which specialty stitches from the A-Z to incorporate?
- Fabric swatch sampler (Greenoff-guided): Cut small squares of 14-count Aida, 18-count Aida, and 28-count evenweave. Work the same 10×10-stitch motif from a Greenoff chart on each, then compare how fabric count changes the finished size and texture.
- Chart-reading drill: Photocopy or print one of Greenoff's smaller sampler charts. Before picking up a needle, annotate every symbol with its DMC color number, mark the center lines, and write out the stitch count for each color area — practice 'reading' the chart completely before stitching.
- Thread-management practice: Using a scrap of 14-count Aida, practice every thread-starting method Greenoff describes (waste knot, away waste knot, loop start) and every finishing method. Label each on the fabric with a permanent marker so you build a personal reference card.
- Alphabet sampler strip: Using the alphabet charts in Greenoff's Bible, stitch your own name or a short word in at least two different lettering styles. Then use the A-Z of Embroidery Stitches to add a back stitch or stem stitch border around it, directly applying the A-Z entries to a real project.
- A-Z stitch dictionary sampler: Create a personal stitch reference cloth — a strip of evenweave with one example of every stitch covered in your A-Z reading sessions (e.g., cross stitch, back stitch, running stitch, satin stitch, French knot). Label each with a small sewn or written tag. This becomes your ongoing reference throughout the curriculum.
- Mini heritage sampler project: Design and complete a small sampler (approx. 4×4 inches on 14-count Aida) that deliberately echoes the historical sampler tradition — include an alphabet row, a border, at least one motif (floral, geometric, or animal), and your initials and year. Use Greenoff for chart and technique guidance and the A-Z for at least two specialty stitches beyond basic cross stitch.
Next up: Mastering counted cross-stitch charts and building a personal stitch vocabulary through these two books equips the reader with the technical precision and stitch literacy needed to advance into freehand embroidery design, where the grid disappears and creative stitch placement, surface texture, and mixed-media techniques take center stage.
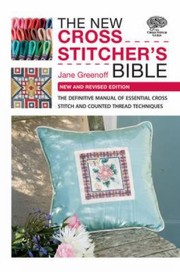
The definitive beginner-to-intermediate cross-stitch reference — covers fabric counts, thread management, reading charts, and finishing, making it the essential companion for this stage.

Bridges pure cross-stitch into the broader embroidery world by showing how specialty stitches (Rhodes, Algerian eye, Hardanger elements) are incorporated into sampler work.
Going Deeper: Technique & Texture
IntermediateMaster a wider palette of surface embroidery techniques — crewelwork, goldwork basics, and dimensional stitching — and understand how to combine them purposefully.
▸ Study plan for this stage
Pace: 8–10 weeks total: Weeks 1–6 for "Crewel Embroidery" by Erica Wilson (~20–25 pages/day, revisiting stitch diagrams slowly), Weeks 7–10 for "Beginner's Guide to Goldwork" by Ruth Chamberlin (~15–20 pages/day, pausing frequently to handle and test materials at the needle).
- Crewelwork as a surface embroidery tradition: the use of wool thread on linen twill to build color, shading, and texture across a design
- Erica Wilson's core stitch vocabulary: outline/stem stitch, laid work, long-and-short shading, satin stitch, couching, and their role in filling large design areas with controlled texture
- Shading and tonal blending in crewel: how thread direction, stitch length variation, and color value transitions create the illusion of form and depth
- Design composition in crewelwork: balancing open laid-work areas against densely stitched ones to create visual rhythm and avoid flatness
- The nature of goldwork materials: passing thread, Japanese gold, purl (rough, smooth, check), and kid leather as distinct textural elements each requiring specific handling techniques
- Chamberlin's foundational goldwork techniques: couching pairs of Japanese gold, cutting and applying purl chips, padding with felt or string to create raised surfaces
- The principle of 'no knots on the back': sinking metal threads with a mellor and chenille needle, and finishing thread ends invisibly — a discipline that distinguishes goldwork from other embroidery
- Purposeful combination: reading both books together to understand how wool surface texture (crewel) and metallic relief (goldwork) can coexist in a single piece through deliberate contrast and compositional planning
- After working through Erica Wilson's stitch instructions, can you explain when you would choose laid work over satin stitch to fill a large shape, and what visual effect each produces?
- How does Wilson approach shading in crewelwork — what is the role of thread direction and stitch length in making a flat surface read as three-dimensional?
- According to Chamberlin, what is the correct method for turning a corner when couching a pair of Japanese gold threads, and why does the angle of the couching stitch matter?
- What is the purpose of padding in goldwork as described by Chamberlin, and how do layers of felt or string padding change the final appearance of purl or passing thread applied over them?
- How do the design considerations for crewelwork (as outlined by Wilson) differ from those for goldwork (as outlined by Chamberlin) in terms of scale, background fabric choice, and thread behavior?
- Having read both books, how would you plan a small sampler that incorporates at least one crewel technique and one goldwork technique in a unified composition — what design and material decisions would you need to make?
- Stitch a crewel sampler block (approx. 6"×6" on linen twill) working through Wilson's core stitches in order — stem stitch outlines, a laid-work fill, a long-and-short shaded petal, and a couched area — labeling each on the back with thread color and stitch name.
- Choose one of Wilson's floral or leaf motifs and stitch it twice: once using only flat satin stitch, and once using long-and-short shading with at least three tonal values of the same color family. Compare the two results and write 3–4 sentences on what the shading adds.
- Following Chamberlin's instructions, practice couching a pair of Japanese gold threads along a curved line, a straight line, and around a tight corner on a spare piece of fabric — focus on consistent couching stitch spacing and clean corner turns.
- Cut and apply purl chips (using both rough and smooth purl if available) to fill a small padded shape as described by Chamberlin. Practice the 'pick up on the needle, measure against the padding, cut, and lay' workflow until the chips sit evenly without gaps.
- Design a 4"×4" composition on paper that combines one crewelwork fill technique (from Wilson) with one goldwork element (from Chamberlin) — annotate the sketch with your thread choices, stitch directions, and the order in which you would work each element.
- Stitch the annotated 4"×4" design from the previous exercise on fabric, then photograph it and write a short self-critique: what worked, what you would change, and which specific guidance from Wilson or Chamberlin you would return to for improvement.
Next up: Mastering the disciplined thread control, material handling, and compositional thinking demanded by crewelwork and goldwork builds the technical confidence and design vocabulary needed to tackle more complex, multi-technique embroidery projects — such as ecclesiastical or heirloom work — where advanced canvas work, silk shading, or mixed-media construction become the next frontier.
Erica Wilson is the definitive American voice in hand embroidery; this classic teaches shading, filling, and layering with wool thread, dramatically expanding a stitcher's expressive range.
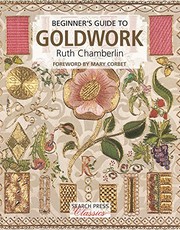
Introduces metal-thread techniques in an accessible, step-by-step way, adding a high-craft dimension that pushes intermediate stitchers toward more ambitious finished pieces.
Original Work: Design & Composition
ExpertMove beyond patterns and kits to design original embroidery — translating personal imagery, color theory, and compositional thinking into stitched artwork.
▸ Study plan for this stage
Pace: 4–5 weeks, ~20–25 pages/day; linger on visual spreads and stitch-sample photography rather than rushing — the book rewards slow, analytical looking as much as reading
- Translating visual source material (nature, texture, photography) into stitch vocabulary — Tellier-Loumagne's core methodology of observation-to-thread
- Stitch as mark-making: understanding how individual stitches function like brushstrokes, with their own direction, weight, and optical texture
- Surface design thinking: treating the fabric ground as a compositional field with foreground, midground, and background relationships
- Color interaction in thread: how adjacent thread colors optically mix differently from paint, and how sheen, matte, and metallic fibers alter perceived hue
- Texture contrast as a compositional tool — pairing dense, raised stitches against open, airy ones to create rhythm and focal points
- Abstraction vs. representation: using Tellier-Loumagne's examples to decide how literally or loosely to interpret a source image
- Building a personal design vocabulary: cataloguing stitch families (linear, filling, knotted, looped) and knowing when each serves a compositional intention
- Iterative sampling as design process: the role of stitch sketches and thread palettes before committing to a final ground
- Looking at any spread in the book, can you identify what real-world source (botanical, geological, textile, etc.) likely inspired the piece, and articulate how Tellier-Loumagne abstracted or distilled it into stitches?
- How does the directionality of stitches in a given sample guide the viewer's eye, and what compositional principle does that reflect?
- What specific properties of a thread (fiber content, twist, ply, sheen) does Tellier-Loumagne exploit to achieve a particular surface quality, and how would you replicate or subvert that choice?
- How does the book demonstrate the use of negative space and the unworked ground as active compositional elements rather than empty background?
- Can you describe a moment in the book where color temperature or value contrast — rather than stitch type — is doing the primary compositional work?
- What is your personal takeaway framework for moving from a source image to a stitch plan — what steps does Tellier-Loumagne model, and what would you add or change for your own practice?
- Source-to-stitch translation study: Choose one photograph or natural object (a leaf, a piece of bark, a fabric scrap). Spend 15 minutes drawing its essential lines and textures on paper, then produce a 4"×4" stitch sample that captures those qualities using only stitches discussed or shown in the book. Compare the sample to the source and write three sentences on what translated well and what was
- Stitch-mark journal: Over two weeks, complete one 3"×3" sampler per day using a single stitch family (e.g., all linear stitches one day, all knotted the next). Vary only direction, density, and thread weight. At the end, arrange them as a grid and analyze which combinations create the strongest visual contrast — directly echoing Tellier-Loumagne's catalog approach.
- Thread palette building: Select a two-page spread from the book that resonates with you. Identify every distinct color and texture of thread visible. Go to your own stash (or a shop) and assemble a physical palette that matches it as closely as possible, then write a brief note on any substitutions and how fiber content changes the effect.
- Compositional thumbnail series: Before beginning any original piece, produce five thumbnail sketches (postcard-sized) of the same subject using different compositional strategies — centered vs. off-center, close-cropped vs. wide, high contrast vs. tonal. Choose one and justify the choice in writing, citing at least one compositional principle visible in Tellier-Loumagne's work.
- Abstraction ladder exercise: Take one representational image (a flower, a face, a landscape). Create three successive 4"×4" stitch samples: one fairly literal, one semi-abstract, one fully non-representational. Use the book's examples as benchmarks for each level of abstraction.
- Design-to-finish original piece: Using all the above as preparation, design and complete one original embroidery of at least 6"×6" from scratch — no kit, no pre-printed pattern. Document the process in a design journal: source images, thread palette, compositional thumbnails, stitch plan, and a written reflection comparing your intentions to the finished result.
Next up: Completing original compositions grounded in Tellier-Loumagne's visual language gives the reader a personal design vocabulary and a finished body of sample work — the ideal foundation for the next stage, which typically deepens either technical mastery (complex stitch structures, goldwork, or dimensional techniques) or conceptual development (series-making, mixed media, or exhibiting embroidery as
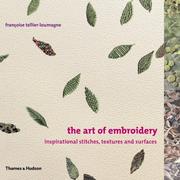
A visually rich survey of contemporary embroidery as fine art, exposing the advanced learner to the full expressive possibilities of the medium and inspiring an original creative voice.
Discussion
Keep reading
Paths that share books, cover the same subject, or open a related topic.