Become a carpenter: from first framing to master trade
This curriculum takes a complete beginner from zero carpentry knowledge to a confident, career-ready craftsperson. It moves through four tightly sequenced stages: building foundational hand-skill and tool literacy, mastering framing and structural rough work, developing finish carpentry and blueprint-reading fluency, and finally understanding the business, apprenticeship, and long-game mindset of a durable skilled trade career.
Foundations: Tools, Wood, and the Craft Mindset
BeginnerUnderstand wood as a material, learn to safely use hand and power tools, and develop the vocabulary and habits that all later carpentry learning depends on.
▸ Study plan for this stage
Pace: 8–10 weeks total. Weeks 1–5: "The Complete Manual of Woodworking" by Albert Jackson (~25–30 pages/day, focusing on wood species, grain, joinery principles, and hand-tool chapters). Weeks 6–10: "Carpentry" by Leonard Koel (~20–25 pages/day, shifting focus to framing, construction-grade lumber, and po
- Wood as a living material — how grain direction, moisture content, and wood movement affect every cut and joint (Jackson, Part 1)
- Hardwood vs. softwood distinctions and how species selection drives tool choice and project planning (Jackson, Chapter on Materials)
- Safe and correct use of hand tools — chisels, planes, handsaws, and marking gauges — including sharpening and maintenance routines (Jackson, Hand Tools chapters)
- Introduction to power tools — circular saws, drills, and jigsaws — with emphasis on guards, stance, and feed direction (Koel, early chapters)
- Reading and interpreting wood: identifying defects, checking for warp/bow/twist, and selecting boards at the lumber yard (Jackson + Koel combined)
- The craft mindset: measure twice, cut once; the habit of test cuts; keeping a tidy, hazard-free workspace (both books)
- Basic joinery vocabulary — butt joints, dado joints, rabbet joints, and mortise-and-tenon — as a foundation for understanding why wood is fastened the way it is (Jackson, Joinery section)
- Construction lumber standards, nominal vs. actual dimensions, and lumber grading as used in real carpentry projects (Koel, Materials chapters)
- After reading Jackson's wood-species section, can you explain why a carpenter would choose pine over oak for a wall-framing project, and oak over pine for a tabletop?
- What are the three main causes of wood movement, and how does Jackson recommend accounting for them when designing or cutting a joint?
- Describe the step-by-step process Jackson outlines for sharpening a bench chisel, and explain why a dull tool is more dangerous than a sharp one.
- According to Koel, what is the difference between nominal and actual lumber dimensions, and why does this matter when laying out a framing plan?
- What personal protective equipment and workspace checks does Koel specify before operating a circular saw, and what are the consequences of skipping them?
- Using vocabulary from both books, explain what a dado joint is, when you would use one, and which tool (hand or power) each author recommends for cutting it.
- Tool handling drill (Jackson): Before making any project cuts, spend one session sharpening a chisel or plane iron to the standard Jackson describes, then make a series of paring cuts across the grain on scrap pine — compare the result to an identical cut made with the tool in its pre-sharpened state.
- Board inspection walk (Jackson + Koel): Visit a lumber yard or home-improvement store with a copy of the defect checklist from Jackson's materials section; physically pick up 10 boards, identify any warp, bow, twist, cup, or knots, and practice selecting the two 'best' boards using Koel's grading guidance.
- Measure-and-mark accuracy challenge (Koel): Using only a tape measure, combination square, and marking knife, lay out five identical 12-inch lengths on a scrap 2×4; cut them with a handsaw and check each piece with a reliable ruler — aim for ±1/32" tolerance, the standard Koel emphasizes for finish carpentry.
- Basic joint sampler (Jackson): Cut one each of a butt joint, a rabbet joint, and a dado joint in scrap softwood using only hand tools as Jackson demonstrates; test each joint for square and flush fit, photograph the results, and note in a project journal what you would do differently.
- Power-tool safety simulation (Koel): Before plugging in a circular saw, rehearse Koel's pre-use checklist out loud — blade guard, blade depth, workpiece clamping, body position, and exit path — three times until it becomes automatic; then make a series of rip cuts and crosscuts on scrap lumber, narrating each safety step aloud.
- Vocabulary flash-card deck (both books): As you read, build a running glossary of every bolded or defined term in both Jackson and Koel (target: 60–80 cards); quiz yourself weekly and use each term correctly in a written sentence describing something you actually cut or built that week.
Next up: Mastering the wood properties, tool safety, and joinery vocabulary established in Jackson and Koel gives the reader the physical confidence and technical language needed to tackle more complex structural and finish carpentry projects in the next stage, where longer plans, tighter tolerances, and multi-step assemblies build directly on these foundational habits.

A comprehensive, heavily illustrated reference that introduces every major tool, joint, and wood type — perfect first vocabulary-builder before any hands-on or career-specific reading.
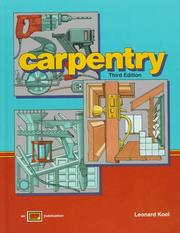
A widely used trade-school textbook that bridges hobbyist woodworking and professional carpentry, covering materials, fasteners, layout, and basic framing in plain language for true beginners.
Rough Carpentry: Framing and Structure
BeginnerRead and interpret construction drawings, lay out and frame walls, floors, roofs, and stairs, and understand how a wood-framed structure goes together from the ground up.
▸ Study plan for this stage
Pace: 8–10 weeks total. Weeks 1–5: "Graphic Guide to Frame Construction" by Rob Thallon (~15–20 pages/day, lingering on every diagram and detail drawing). Weeks 6–10: "Building Construction Illustrated" by Francis D. K. Ching (~12–18 pages/day, pausing to sketch and redraw key figures by hand). Allow one
- Reading and interpreting construction drawings, sections, and detail drawings as presented in Thallon's graphic format
- Platform vs. balloon framing systems and why platform framing dominates modern wood construction (Thallon, Chapter 1)
- Floor system components: sill plates, rim joists, floor joists, bridging, and subfloor sheathing, and how loads transfer downward (Thallon)
- Wall framing anatomy: bottom plates, top plates, studs, headers, king studs, jack studs, cripples, and rough openings for doors and windows (Thallon)
- Roof framing fundamentals: rafter layout, ridge boards, collar ties, ceiling joists, and the logic of common, hip, valley, and jack rafters (Thallon)
- Stair framing: rise, run, stringer layout, and code-driven proportions (Thallon)
- How structural loads (dead, live, lateral) travel through a wood-framed building from roof to foundation, as illustrated in Ching's systems diagrams
- Building envelope integration: how sheathing, housewrap, and openings tie the structural frame to weatherproofing (Ching)
- After studying Thallon's detail drawings, can you identify every named component in a platform-framed wall section — from foundation sill to double top plate — and explain what each one does?
- What is the structural difference between a load-bearing wall and a partition wall, and how does each appear in a floor plan per Ching's conventions?
- How do you calculate and lay out a rough opening for a window or door, accounting for king studs, jack studs, the header, and cripples as shown in Thallon?
- Using Ching's load-path diagrams, can you trace how a snow load on the roof travels through rafters, walls, floor joists, and into the foundation?
- What are the key differences between a gable roof, hip roof, and shed roof in terms of framing members required, as detailed in Thallon's roof framing chapter?
- How do rise, run, and total rise determine stringer layout for a staircase, and what common code limits govern those numbers per Thallon?
- Sketch-to-learn (Thallon): Choose any five detail drawings from the Graphic Guide and redraw them freehand at a larger scale, labeling every component from memory before checking the original.
- Component scavenger hunt: Visit a house under construction or a framing lumber yard and physically identify and photograph at least 10 framing members you studied in Thallon (rim joist, jack stud, ridge board, etc.).
- Load-path diagram (Ching): Draw your own simplified cross-section of a two-story wood-framed house and annotate the path of a roof live load all the way to the footing, using Ching's notation style.
- Rough-opening calculation worksheet: Using Thallon's formulas, calculate and sketch the rough opening layout for three different window sizes and two door sizes, showing all framing members to scale on graph paper.
- Mini floor-framing model: Using craft sticks or scrap lumber, build a small-scale model of a platform-framed floor bay — sill plate, rim joist, three floor joists with blocking, and a plywood subfloor panel — referencing Thallon's floor system drawings.
- Reading a real plan set: Download a free residential construction drawing set online and, using skills from both Thallon and Ching, identify the floor plan, foundation plan, and at least one wall section; annotate a printed copy with the names of every framing element you can find.
Next up: Mastering how a wood-framed structure is assembled from the ground up — its members, connections, and load paths — gives you the structural literacy needed to move into finish carpentry and millwork, where precision trim, cabinetry, and built-ins must be fitted accurately to the frame you now understand inside and out.
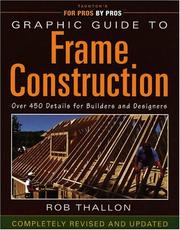
Entirely visual and detail-driven, this book translates abstract framing concepts into clear drawings — read it first in this stage to build a mental picture before tackling text-heavy framing manuals.

Teaches how to read and reason through architectural and structural drawings — essential for any carpenter who needs to translate plans into real-world cuts and assemblies on a job site.
Finish Carpentry and Craftsmanship
IntermediateExecute precise interior finish work — trim, doors, windows, stairs, and cabinetry — and internalize the standards of quality that separate a journeyman from a true craftsperson.
Shifts focus from speed to deliberate, hand-tool craftsmanship and teaches the philosophy of quality work — a mindset essential for finish carpentry and for building a reputation that sustains a long career.
Career, Apprenticeship, and the Long Game
IntermediateNavigate apprenticeship programs and union or non-union routes, understand the business side of skilled trades, and frame carpentry as durable, AI-proof work worth a lifetime commitment.
▸ Study plan for this stage
Pace: 10–12 weeks total: Week 1–3 — "Shop Class as Soulcraft" (~25–30 pages/day, reading reflectively with journaling); Week 4–7 — "The Contractor's Legal Kit" (~20–25 pages/day, slower pace for dense legal content, re-reading key clauses); Week 8–12 — "Markup & Profit" (~20 pages/day with a calculator in
- Crawford's argument that manual trades offer cognitive depth, autonomy, and meaning that white-collar work often cannot — grounding your commitment to carpentry as a deliberate, intellectual career choice
- The distinction between a 'job' and a 'vocation' in the trades: how apprenticeship is a structured initiation into a community of practice, not just cheap labor
- Union vs. non-union apprenticeship routes: the role of the JATC/UBC programs, multi-year progression, wage scales, and what you trade away or gain on each path
- The legal anatomy of a construction contract as laid out in Ransone's kit: scope of work, change-order clauses, lien rights, dispute resolution, and why every carpenter who ever wants to run a crew or go independent must understand these
- Liability, licensing, and insurance fundamentals from Ransone: the difference between general liability, workers' comp, and contractor's license bonds, and the personal financial exposure of getting them wrong
- Stone's core pricing philosophy: the fatal difference between markup and margin, and why most contractors go broke by confusing the two
- Building a fully-loaded hourly rate (FLHR) from scratch: how to account for non-billable hours, overhead, owner's salary, and desired net profit before quoting a single job
- The 'long game' mindset: using Crawford's philosophical framework alongside Stone's financial discipline to position carpentry as a durable, AI-resistant, wealth-building career over decades
- After reading Crawford, how would you articulate — in your own words — why skilled manual work is intellectually serious and resistant to automation, and how does that argument shape your personal career commitment?
- What are the three most dangerous contract clauses Ransone warns against, and what specific language would you insist on (or strike) before signing or issuing a construction agreement?
- Walk through the step-by-step process Stone prescribes for calculating your markup percentage — starting from desired net profit and working backward through overhead and direct costs. What number do you get for a hypothetical small carpentry operation?
- What is the difference between a mechanic's lien and a stop-notice, and under what circumstances would a carpenter or subcontractor use each one?
- How does Stone define 'overhead,' and what are five expense categories that apprentice carpenters typically forget to include when they first try to price their own work?
- Using Crawford's framework, how does the apprenticeship model — learning under a master, progressing through journeyman to master — mirror the historical guild tradition, and why does that structure produce better tradespeople than self-teaching alone?
- Crawford reflection journal: After finishing 'Shop Class as Soulcraft,' write a 1–2 page personal manifesto explaining why you are choosing carpentry as a long-term career. Use at least three specific arguments from Crawford to defend the choice against skeptics who would push you toward a desk job.
- Contract red-line drill: Download a free AIA or residential construction contract template online. Using Ransone's book as your guide, go clause by clause and annotate every provision — highlight what protects you, what exposes you, and what you would negotiate. Do this for both a subcontractor agreement and a direct client contract.
- Lien rights research project: Look up the mechanic's lien statutes for your specific state/province. Map the key deadlines (preliminary notice, lien filing, enforcement) onto a one-page timeline and compare them to the general framework Ransone describes.
- Markup vs. margin flashcard test: Create 20 flashcards with job-cost scenarios (e.g., 'Materials: $4,000, Labor: $2,000, desired 20% net profit margin — what is your markup and your final price?'). Drill them until you can solve each in under 60 seconds without the book.
- Build your own FLHR spreadsheet: Using Stone's methodology, build a real spreadsheet for a hypothetical one-person carpentry operation. Plug in realistic annual costs (tools, vehicle, insurance, phone, slow weeks, unpaid admin time) and calculate the minimum billable hourly rate needed to hit a $65,000 net salary. Adjust inputs and observe how the rate changes.
- Apprenticeship comparison chart: Research two formal apprenticeship programs available to you (one union, e.g., UBC; one non-union or employer-based). Create a side-by-side table covering duration, wage progression, certifications earned, geographic portability, and total estimated earnings over the apprenticeship period. Use Crawford's 'community of practice' lens to evaluate which better develop
Next up: Mastering the philosophical 'why,' the legal foundations, and the financial pricing logic of this stage gives you the professional identity and business literacy needed to advance into more specialized technical or entrepreneurial carpentry topics — whether that means estimating complex projects, managing crews, or building a specialty niche — without being exploited or going broke along the way.
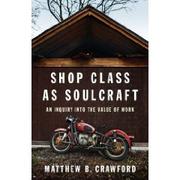
A philosopher-mechanic's argument for why skilled manual work is intellectually rich and economically resilient — essential reading for cementing the 'why' behind a carpentry career before tackling the 'how' of business.

Covers contracts, licensing, liability, and client relationships in plain English — the practical business literacy every carpenter needs whether going independent or moving into a lead or foreman role.

The canonical small-contractor pricing and estimating guide; reading it last ensures you can translate your hard-won craft skills into a financially sustainable career rather than an underpaid one.
Discussion
Keep reading
Paths that share books, cover the same subject, or open a related topic.