Discover / Reading path

Pour better candles

@craftsherpaNew to it → Some background
2
Books
~8
Hours
2
Stages
Not yet rated

This curriculum takes a complete beginner from the very basics of candle making — materials, tools, and safety — through hands-on craft mastery, and finally into the science and business of producing quality candles at scale. Each stage builds vocabulary and practical intuition needed for the next, moving from "what is wax?" to "how do I run a professional candle operation?"

1

Foundations: Materials & First Pours

New to it

Understand the core materials (waxes, wicks, fragrance, dyes, containers) and safely complete your first candles with confidence.

Study plan for this stage

Pace: 3–4 weeks, ~20–25 pages/day — read The Candlemaker's Companion chapter by chapter, pausing after each major section (materials, wicking, fragrance/dye, pouring) to review notes and attempt the corresponding hands-on exercise before moving on.

Key concepts
  • Wax types and their properties: paraffin, beeswax, soy, and gel — melting points, shrinkage rates, and best use cases as covered by Oppenheimer
  • Wick selection and sizing: understanding how wick diameter, material (cotton, zinc-core, wood), and wax type interact to produce a clean, even burn
  • Safe melting and temperature control: using a double boiler, thermometers, and respecting flash points to prevent fire hazards — a safety emphasis Oppenheimer returns to throughout the book
  • Fragrance and essential oils: fragrance load percentages, when to add scent relative to pour temperature, and how to avoid scent throw problems
  • Colorants and dyes: dye blocks vs. liquid dyes vs. pigments, how concentration affects the finished candle, and which colorants are safe for container vs. pillar work
  • Container selection: heat resistance, material compatibility (glass, tin, ceramic), and how container diameter drives wick choice
  • The pour process: pre-heating containers, pour temperature windows, managing sinkholes with a second pour, and proper cure time before burning
  • Basic troubleshooting: diagnosing common first-pour problems such as frosting, wet spots, tunneling, and poor scent throw using Oppenheimer's guidance
You should be able to answer
  • According to The Candlemaker's Companion, what are the key differences between paraffin and soy wax in terms of melting point and how each affects fragrance throw?
  • How does Oppenheimer recommend choosing the correct wick size for a given container diameter and wax type, and why does an incorrectly sized wick cause problems?
  • What safety precautions does Oppenheimer outline for melting wax, and what should you do if wax ignites?
  • At what temperature range should fragrance oil be added to melted wax, and why does adding it too hot or too cool affect the finished candle?
  • What is a 'second pour' and when does Oppenheimer say it is necessary?
  • How do you diagnose and fix the three most common beginner defects — tunneling, frosting, and wet spots — based on what you have read?
Practice
  • Material comparison chart: After reading the wax chapters, create a one-page reference table listing each wax type Oppenheimer covers, its melt point range, recommended fragrance load %, shrinkage behavior, and ideal candle format (container, pillar, votive).
  • Wick test burn: Make three identical small container candles using the same wax and fragrance but three different wick sizes. Burn each for 4 hours, then measure melt-pool diameter and note any mushrooming, soot, or tunneling — record results in a burn log.
  • First container candle pour: Following Oppenheimer's step-by-step instructions, complete your very first candle from scratch — weigh wax, melt safely, add fragrance at the correct temperature, pour, and perform a second top-up pour if a sinkhole forms. Document every temperature reading.
  • Fragrance load experiment: Make two candles from the same wax batch — one at the minimum fragrance load Oppenheimer recommends and one at the maximum. After a 48-hour cure, do a cold-throw and hot-throw comparison and note the difference.
  • Troubleshooting journal: Photograph every finished candle from your exercises and annotate each photo identifying any defects (frosting, wet spots, uneven tops). Use Oppenheimer's troubleshooting section to write one sentence of diagnosis and one sentence of corrective action for each defect found.
  • Safety checklist creation: Draft a personal workspace safety checklist based solely on the safety guidelines in The Candlemaker's Companion — include equipment needed, temperature checkpoints, fire response steps, and ventilation requirements. Post it in your workspace.

Next up: Mastering materials and first pours gives you the controlled, repeatable baseline you need to move confidently into intermediate techniques — such as layered pours, pillar and mold work, and advanced scent blending — where precise knowledge of wax behavior and wick performance becomes the foundation for creative experimentation.

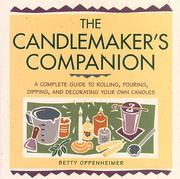
The candlemaker's companion
Betty Oppenheimer · 1997 · 199 pp

The single most recommended beginner reference in the craft — covers every wax type, wick selection, fragrance basics, and safety in plain language. Read this first to build the essential vocabulary for everything that follows.

2

Craft Deepening: Wax, Scent & Wick Mastery

Some background

Develop a nuanced understanding of how different waxes behave, how to properly load and test fragrance oils, and how wick sizing affects burn quality and safety.

Study plan for this stage

Pace: 3–4 weeks, ~20–30 pages/day; read each chapter once for comprehension, then revisit wax-type and wick-sizing sections with notes before moving on

Key concepts
  • Wax taxonomy and behavior: paraffin grades (melt point, oil content), soy wax blending characteristics, beeswax contraction and adhesion, and gel wax clarity rules as covered by Coney
  • Fragrance oil loading: maximum fragrance load (MFL) per wax type, flash point safety thresholds, and the role of fragrance in wax hardness and color throw
  • Hot throw vs. cold throw: how wax type, pour temperature, and cure time each influence scent diffusion in the finished candle
  • Wick sizing fundamentals: the relationship between vessel diameter, wax type, and wick series (cotton, wood, CD, ECO) and how Coney's projects illustrate sizing decisions
  • Burn quality indicators: full melt pool timing, mushrooming, tunneling, soot, and flame height as diagnostic tools
  • Pour temperature discipline: how pouring too hot or too cold creates sinkholes, frosting, wet spots, and poor fragrance retention
  • Testing methodology: the structured burn-test cycle (trim, light, observe, record) that underpins every wick and fragrance decision
  • Safety and compliance basics: flash point awareness, ventilation, fire extinguisher protocol, and labeling considerations introduced in Coney's text
You should be able to answer
  • According to Coney, how does the oil content of a paraffin wax grade affect its fragrance load capacity and finished surface appearance?
  • What is flash point, why does it matter when adding fragrance oil to melted wax, and what general rule does Coney recommend for pour temperature relative to flash point?
  • How would you diagnose and correct tunneling in a container candle — what wick, wax, or process variable is most likely responsible?
  • What is the difference between hot throw and cold throw, and which stage of the candle-making process most directly influences each?
  • Walk through the burn-test cycle as described in the book: what do you observe, record, and adjust between each test burn?
  • How does vessel diameter drive wick selection, and what does Coney suggest when a single wick cannot achieve a full melt pool within the recommended time?
Practice
  • Wax comparison matrix: Make three identical 4 oz container candles using paraffin, soy, and a beeswax blend (same fragrance, same wick). Burn all three side by side and document melt pool timing, scent throw, and surface finish differences in a dedicated log.
  • Fragrance load ladder test: Using one wax type, pour four small tins at 6 %, 8 %, 10 %, and 12 % fragrance load. After a 48-hour cure, cold-throw and burn-test each; record at what load you detect seeping, poor adhesion, or diminished throw.
  • Wick sizing bracket: Choose one vessel diameter and run three candles with a wick one size below, at, and one size above your initial guess. Conduct three 4-hour burn sessions, trimming to ¼ inch each time, and photograph the melt pool and wick mushroom at each session.
  • Pour temperature experiment: Pour four identical soy candles at 120 °F, 135 °F, 150 °F, and 165 °F (adjusting for your wax's recommended range). Compare surface texture, frosting, wet spots, and scent throw after curing to internalize how temperature affects outcome.
  • Burn-test journal: Commit to a structured 2-week burn-test journal for every candle made during this stage — log date, wick ID, wax type, fragrance %, pour temp, room temp, burn duration, flame height, melt pool diameter, and any defects observed.
  • Defect diagnosis drill: Intentionally create one tunneling candle (under-wicked) and one sooting candle (over-wicked), photograph the results, write a one-paragraph root-cause analysis for each, and re-make both with corrected wick sizes to confirm the fix.

Next up: Mastering how wax, fragrance, and wick interact at a technical level gives you the controlled, repeatable baseline you need to move confidently into advanced candle design — exploring colorants, decorative techniques, specialty vessels, and multi-wick or pillar formats — without guessing why a candle performs the way it does.

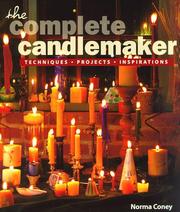
The complete candlemaker
Norma J. Coney · 1997 · 128 pp

Goes deeper into the chemistry and behavior of paraffin, soy, beeswax, and blends, giving the intermediate maker a framework for troubleshooting common defects like sinkholes, frosting, and poor scent throw.

Discussion