Decorate cakes like a pastry pro
This curriculum takes a complete beginner from understanding basic baking and frosting fundamentals all the way to confidently producing polished, bakery-quality buttercream, piped designs, and stacked layer cakes. Each stage builds directly on the last — you'll first develop reliable recipes and technique vocabulary, then master buttercream and piping in depth, and finally tackle the structural and artistic challenges of professional-looking layer cakes.
Foundations: Baking & Frosting Basics
BeginnerUnderstand core baking science, produce consistent cake layers, and make your first simple buttercreams with confidence.
▸ Study plan for this stage
Pace: 6–8 weeks total: Weeks 1–4 on "The Cake Bible" (~25–30 pages/day, focusing on the introductory science chapters and core cake/frosting recipes); Weeks 5–8 on "BraveTart" (~20–25 pages/day, reading recipe headnotes and technique essays carefully alongside the recipes themselves).
- Baking science fundamentals from The Cake Bible: the roles of fat, sugar, flour, eggs, and leavening agents and how they interact to create structure, tenderness, and moisture
- Rose Levy Beranbaum's 'reverse creaming' (two-stage) mixing method and why it produces a finer, more even crumb compared to traditional creaming
- The importance of precise measurement by weight (grams/ounces) over volume, as emphasized throughout The Cake Bible's recipes and ratio charts
- How oven temperature, pan size, and batter depth affect bake time and final texture — using The Cake Bible's conversion charts and troubleshooting guides
- Buttercream taxonomy from The Cake Bible: American, Swiss meringue, and mousseline buttercreams — their ingredients, stability differences, and ideal use cases
- Stella Parks's historical and ingredient-driven approach in BraveTart: understanding how classic American cake and frosting recipes evolved, and why ingredient quality (real butter, fresh eggs, pure vanilla) dramatically changes results
- BraveTart's emphasis on 'from-scratch' technique discipline: toasting flour, blooming cocoa, and other small preparatory steps that build deep flavor in simple cakes
- Reading and trusting a recipe as a complete system — both authors stress that substitutions or shortcuts break the tested balance of a formula
- After reading The Cake Bible, can you explain what happens structurally when you over-cream butter and sugar, and how the reverse-creaming method prevents that problem?
- The Cake Bible provides weight-based measurements throughout — why does Rose Levy Beranbaum argue that weighing ingredients is non-negotiable for consistent results, and what common volume-measurement errors does this correct?
- How does Beranbaum define the difference between a mousseline buttercream and a simple American buttercream, and in what decorating scenarios would you choose one over the other?
- BraveTart's headnotes often explain the origin of a recipe — how does Stella Parks use historical context to justify specific techniques (e.g., her approach to yellow cake or fudge frosting), and what does this tell you about why recipes work?
- After working through both books, what are three variables (one from mixing, one from baking, one from ingredients) that most commonly cause uneven or domed cake layers, and how would you correct each?
- Both authors treat frosting as a science, not just an afterthought — what shared principles about fat temperature, sugar concentration, and emulsification appear in both The Cake Bible and BraveTart?
- Bake the same basic yellow butter cake twice in one week: first using the conventional creaming method, then using The Cake Bible's reverse-creaming method. Photograph the crumb cross-section of each and write a one-paragraph comparison of texture, height, and moisture.
- Complete a weight-vs-volume measurement audit: measure 1 cup of all-purpose flour five times by scooping and leveling, weigh each result in grams, and record the variance. Then measure by spooning into the cup and leveling. Compare both sets to The Cake Bible's stated gram weight and reflect on what this means for recipe consistency.
- Make all three buttercreams introduced in The Cake Bible — American, Swiss meringue, and mousseline — in the same week. Taste and texture-test each at three temperatures (cold from fridge, room temperature, and slightly warm). Document how spreadability and flavor change, and note which you'd use for a crumb coat vs. a final decorative layer.
- Choose one recipe from BraveTart (recommended: her Classic Yellow Cake or Devil's Food Cake) and read the full headnote and recipe before touching any ingredient. Write down every technique step Parks flags as critical and why. Then bake it, deliberately following every instruction — including any toasting, blooming, or resting steps — and note whether skipping even one changes the result.
- Practice leveling and torting: bake two 8-inch rounds from The Cake Bible, let them cool completely, then use a serrated knife and ruler (or cake leveler) to trim domes and split each layer in half horizontally. Stack all four layers with a thin coat of Swiss meringue buttercream between each. Evaluate whether your layers are even and your stack is straight.
- Keep a 'baking journal' throughout the entire stage: for every bake, log the recipe source, any deviations, oven temperature (verified with an oven thermometer), and the outcome. After 6–8 weeks, review your notes to identify your single most consistent error and form a correction plan before moving to the next stage.
Next up: Mastering the science of consistent cake layers and smooth buttercreams from these two books gives you the reliable, repeatable base you'll need to confidently move into intermediate decorating techniques — such as crumb coating, working with fondant, and piping — where structural and surface imperfections can no longer be hidden and must be solved at the baking and frosting stage.
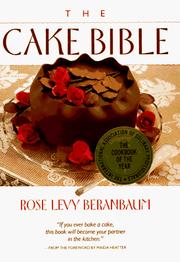
The definitive starting reference for understanding WHY cakes work — ratios, ingredients, and troubleshooting — giving you the scientific vocabulary every later technique book assumes you have.
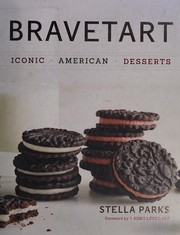
Builds on Beranbaum's science with deeply tested, approachable recipes including classic American buttercreams and layer cakes, bridging theory into reliable everyday practice.
Buttercream Mastery
BeginnerLearn to make, flavor, color, and apply all major buttercream styles (American, Swiss meringue, Italian meringue) to achieve smooth, bakery-level finishes.
▸ Study plan for this stage
Pace: 3–4 weeks, reading ~20–30 pages per day. Zoë François writes in a warm, approachable style, so prioritize reading each recipe fully before attempting it in the kitchen. Dedicate Week 1 to the foundational chapters (ingredients, tools, and American buttercream), Week 2 to Swiss and Italian meringue b
- Understanding the fat-to-sugar ratio in American buttercream and how it affects sweetness, texture, and pipability
- The role of heat and egg whites in Swiss meringue buttercream (SMBC) — cooking to 160°F, whipping to stiff peaks, then incorporating butter
- Italian meringue buttercream (IMBC) mechanics — hot sugar syrup cooked to soft-ball stage (240°F) poured into whipping whites to create a stable, silky base
- Butter temperature as a critical variable: too cold causes curdling, too warm causes soup — and how to rescue both
- Flavoring buttercream beyond vanilla: fruit reductions, citrus zests, espresso, chocolate ganache, and liqueurs without breaking the emulsion
- Gel vs. liquid food coloring: why gel is preferred for buttercream, how to build color gradually, and how colors deepen over time
- Achieving a smooth, crumb-coated finish: the two-coat method (thin crumb coat + chill + final coat) and using a bench scraper and offset spatula
- Reading Zoë François's visual cues and troubleshooting tips embedded in her recipe headnotes and step photos
- What are the three major buttercream styles covered in Zoë Bakes Cakes, and what is the primary structural difference between American buttercream and the two meringue-based buttercreams?
- According to Zoë François, what temperature should butter be before it is added to a Swiss meringue base, and what does the mixture look like when it is properly emulsified?
- What steps does Zoë recommend when your meringue buttercream looks broken or soupy, and why does her fix work from a science standpoint?
- How does Zoë approach adding gel color to buttercream — what technique does she use to avoid streaks and overly dark results?
- What is the purpose of the crumb coat, and how long does Zoë suggest chilling the cake before applying the final layer of buttercream?
- Which flavoring additions does Zoë warn can destabilize buttercream, and what adjustments does she suggest to compensate?
- Make all three buttercreams (American, SMBC, IMBC) in the same week using Zoë's recipes, side by side — taste, texture, and pipability comparison notes in a baking journal
- Intentionally break a batch of SMBC (by adding cold butter) and then rescue it using Zoë's method; repeat with an overheated batch to build muscle memory for troubleshooting
- Practice the crumb coat + final coat technique on a simple two-layer cake: use a bench scraper and offset spatula to achieve a smooth, sharp-edged finish, referencing Zoë's step-by-step photos
- Create a color swatch card: tint small portions of SMBC with gel color at 1-hour intervals to observe how the color deepens, documenting ratios in your baking journal
- Flavor three small bowls of American buttercream with three different add-ins from Zoë's suggestions (e.g., espresso, lemon zest, raspberry reduction) and evaluate stability and taste
- Execute one complete cake project from Zoë Bakes Cakes — from baking the layers through crumb coat, final buttercream coat, and any piped decoration — as a capstone bake for the stage
Next up: Mastering buttercream application and smooth finishes in this stage builds the clean, stable canvas needed for the next stage, where decorative techniques like piping, textured designs, fondant work, or advanced garnishes are applied on top of a perfectly prepared cake.

A visually rich, beginner-friendly guide that walks through buttercream application, crumb-coating, and simple finishing techniques with clear step-by-step photography.
Piping Techniques
IntermediateDevelop consistent, controlled piping skills — rosettes, shells, borders, flowers, and lettering — using the right tips and pressures.
▸ Study plan for this stage
Pace: 3–4 weeks, ~20–25 pages/day; spend extra time re-reading technique breakdowns and studying the step-by-step photo sequences before each practice session
- Piping tip selection: matching the correct nozzle (petal, leaf, star, round, etc.) to each flower or decorative element
- Pressure control: understanding how bag pressure governs petal size, thickness, and consistency across repeated motifs
- Bag angle and wrist mechanics: how the angle of the piping bag and hand rotation affect petal shape, curl, and dimension
- Royal icing and buttercream consistency: recognising stiff, medium, and soft peak consistencies and when each is required for flowers vs. borders
- Building dimensional flowers: layering petals in sequence (e.g., roses, pansies, daisies) to create realistic depth and form
- Colour blending in the bag: loading two-tone or gradient icing to achieve natural-looking petal shading
- Consistent repetition for borders and shells: maintaining uniform spacing, pressure, and rhythm to produce professional-looking runs
- Lettering fundamentals: controlling flow and line weight with a round tip to produce clean, even script or block lettering
- What nozzle types does Lindy Smith recommend for specific flower varieties (e.g., petal tip for roses, leaf tip for foliage), and why is tip choice critical to the final result?
- How does icing consistency differ between piping a delicate flower petal and piping a structural border or shell, and how would you adjust your recipe accordingly?
- Describe the sequence of steps Lindy Smith outlines for building a multi-petal flower — what order are petals added and why?
- What role does bag angle play when piping rosettes versus shells, and how does changing the angle alter the finished shape?
- How can you achieve a two-tone or gradient colour effect within a single piping bag, and which flowers in the book benefit most from this technique?
- What common piping faults (e.g., gaps between petals, uneven shell size, wobbly lettering lines) does the book address, and what corrections are suggested?
- Tip sampler drill: pipe the same basic rosette using at least four different star/round tips on parchment paper, label each, and compare how tip shape changes the outcome — repeat until results are consistent across a full row
- Pressure-control ladder: pipe a single continuous shell border, consciously varying pressure from light to heavy and back, then attempt a second row with perfectly uniform pressure — photograph both rows to compare
- Flower-build log: following Lindy Smith's step-by-step sequences, construct five different flowers (e.g., rose, pansy, daisy, blossom, leaf spray) on a flower nail or parchment square, allow to dry, and mount them in a notebook with notes on what worked and what to adjust
- Two-tone bag loading: mix two complementary colours, load them side-by-side into a petal-tip bag, and pipe at least 20 petals, rotating the bag to explore how angle affects colour placement — aim for natural-looking shading
- Border repetition challenge: pipe a 30 cm run of shells, a 30 cm run of rosettes, and a 30 cm run of rope/scroll border on a cake dummy or sheet of parchment; measure spacing consistency with a ruler and repeat until gaps are within 2 mm of each other
- Lettering practice sheet: using a round tip (e.g., Wilton #2 or #3), pipe the full alphabet in both block and script styles on parchment, then pipe a short phrase ('Happy Birthday') on a cake dummy — repeat daily until line weight and letter spacing feel controlled and even
Next up: Mastering the pressure control, tip selection, and dimensional layering practiced here builds the precise hand skills needed to move into advanced sugar-craft and structural decoration stages, where those same piping fundamentals are applied to more complex, large-scale designs on finished cakes.
The canonical piping reference used in professional courses worldwide; covers every standard tip, motion, and pressure technique in a logical, drill-based progression ideal for building muscle memory.

Expands beyond the Wilton basics into more expressive piped textures and decorative styles, helping you develop your own visual voice after mastering the fundamentals.
Layer Cakes: Structure & Design
IntermediateConstruct tall, level, structurally sound layer cakes with professional fillings, sharp edges, and cohesive decorative designs.
▸ Study plan for this stage
Pace: 3–4 weeks, ~20–30 pages/day, with dedicated baking/decorating sessions on weekends to practice techniques alongside reading
- Torting and leveling cake layers to achieve uniform height and a stable foundation for stacking
- Choosing and applying professional fillings (buttercreams, ganaches, curds, jams) that complement flavor and provide structural support between layers
- Crumb-coating and chilling as essential steps for trapping loose crumbs and creating a smooth base for final coverage
- Achieving sharp, clean edges on the final coat of buttercream or ganache using scrapers and bench tools
- Understanding color theory and mixing edible paints and food colorings to create cohesive, intentional palettes across a cake's design
- Painted and illustrated surface decoration techniques — brush strokes, watercolor washes, and illustrative motifs — as taught through Collins's artistic approach in The Painted Cake
- Translating a design concept into a unified decorative plan, balancing painted elements with structural and textural components
- Troubleshooting common layer-cake problems: bulging filling, sliding tiers, air bubbles, and uneven color application
- How do you ensure each cake layer is perfectly level before stacking, and what tools does Collins recommend or imply for this process?
- What role does chilling play between the crumb coat and final coat stages, and how does it affect the sharpness of edges?
- How does Collins approach color mixing for edible paints, and what principles guide building a cohesive color palette on a painted cake?
- What brush techniques are demonstrated in The Painted Cake, and how do you adapt fine-art painting concepts to a curved, edible surface?
- How do you select a filling that is both flavorful and structurally appropriate for a tall layer cake that must hold its shape at room temperature?
- How would you plan a complete layer cake from concept to finished design, integrating the structural and decorative lessons from The Painted Cake?
- Bake a three- or four-layer cake, practicing torting each layer with a serrated knife and a turntable; use a ruler to verify each layer is within 1/4 inch of the target height before stacking.
- Execute a full crumb coat, refrigerate for at least 30 minutes, then apply a final buttercream coat and practice achieving sharp top and bottom edges using a bench scraper and offset spatula — photograph the result for self-critique.
- Mix at least four custom edible paint colors inspired by a single reference image (a flower, landscape, or fabric swatch), practicing Collins's color-mixing guidance to match hues as closely as possible before applying them to a practice board or dummy cake.
- Recreate one complete painted motif from The Painted Cake on the side of a frosted dummy or real cake, focusing on brush control, layering washes from light to dark, and maintaining clean lines on a curved surface.
- Design a 'cake brief' on paper: sketch the layer structure, choose fillings, plan the color palette, and thumbnail the painted decoration — then execute the full cake over a weekend, comparing the finished result to your original sketch.
- Slice your finished layer cake and photograph the interior cross-section; evaluate the evenness of layers, consistency of filling thickness, and absence of large air pockets, then write a short self-assessment noting what to improve next time.
Next up: Mastering the structural integrity and painted surface design of single-tier layer cakes in this stage builds the confidence and precision needed to tackle multi-tier stacked cakes and advanced sculptural or fondant-based decorating techniques in the next stage.

Introduces artistic finishing touches like painted buttercream effects and textured surfaces, elevating your layer cakes from well-made to genuinely bakery-worthy in appearance.
Advanced Finishing & Signature Style
ExpertCombine everything into a personal decorating style — mastering advanced buttercream textures, floral piping, and the design thinking behind cakes that look truly professional.
▸ Study plan for this stage
Pace: 3–4 weeks, ~20–30 pages/day; dedicate weekends to full project bakes inspired by each chapter's reveal technique
- Structural cake engineering: building interior reveals (hidden shapes, layers, and patterns) that survive slicing without collapsing
- Advanced buttercream finishing: achieving smooth, textured, and sculpted exterior surfaces that complement — not compete with — the interior surprise
- Design thinking for cohesive cakes: aligning the exterior aesthetic, color palette, and theme with the hidden interior so the full cake tells one unified story
- Precision baking and assembly: using templates, cutters, and careful stacking to embed geometric or figurative shapes inside a cake with clean edges
- Floral and decorative piping as a signature element: using piped details on the exterior to hint at or contrast with the interior reveal
- Color theory in cake design: intentional use of dyed batters, frostings, and layers to create visual impact both inside and out
- Occasion-driven design thinking: adapting surprise elements and finishing styles to specific celebrations, audiences, and emotional moments
- Developing a personal decorating signature: synthesizing technical skills into a repeatable, recognizable aesthetic style
- How does Rettke engineer the interior of a surprise-inside cake so that the hidden shape holds its form when the cake is cut and served?
- What role does the exterior finish (buttercream texture, color, decoration) play in building anticipation for the interior reveal, and how should the two be designed together?
- How do you select and adapt a surprise-inside concept for a specific occasion or recipient, balancing wow-factor with practicality?
- What are the most common structural failures in surprise-inside cakes, and what techniques from the book prevent them?
- How can floral piping or other advanced exterior decorations be used as a thematic bridge between the outside and inside of a cake?
- After working through Rettke's projects, how would you define your own emerging signature style — what elements would you keep, adapt, or discard?
- Template & reveal bake: Choose one geometric surprise (heart, star, or number) from the book, create your own paper template, and execute the full bake — then photograph the cross-section slice to evaluate precision
- Exterior-to-interior concept map: Before baking, sketch the exterior decoration and interior reveal side by side on paper, writing one sentence explaining how they relate thematically; then execute the cake and compare result to plan
- Buttercream texture study: Practice at least three distinct exterior finishes (smooth palette-knife, rustic swipe, and a piped texture) on dummy cakes or sheet cake scraps, photographing each for a personal reference library
- Occasion brief challenge: Pick a real upcoming event (birthday, holiday, baby shower) and design a surprise-inside cake from scratch — write a one-page brief covering theme, interior reveal, exterior finish, and color palette before touching any batter
- Floral piping accent session: Spend one focused practice session piping roses, leaves, or other florals onto parchment, then apply the best results to the exterior of a finished surprise-inside cake as a signature finishing touch
- Style audit: After completing 2–3 project cakes from the book, lay out photos of all your finished cakes from this entire curriculum stage and write a short paragraph identifying recurring choices (colors, textures, shapes) that define your personal decorating voice
Next up: Mastering the integration of hidden interior design with polished exterior finishing in Rettke's framework gives the decorator a complete toolkit of both technical execution and design thinking, which is the essential foundation for tackling any specialized advanced discipline — such as sugar work, fondant sculpting, or wedding cake construction — in subsequent stages.

Pushes creative and structural thinking further by designing cakes from the inside out, sharpening your planning and execution skills for complex, show-stopping results.
A professional-level capstone covering advanced buttercream painting, sharp-edge techniques, and floral piping — the closest a book gets to replicating high-end bakery finishing skills.
Discussion
Keep reading
Paths that share books, cover the same subject, or open a related topic.