Restore an old bicycle
This curriculum takes a complete beginner from "what is a derailleur?" to confidently stripping, restoring, and fine-tuning any bicycle. The four stages move from essential tool/safety literacy → routine maintenance → full mechanical mastery → restoration craft and finishing, so each stage's vocabulary and hands-on confidence feeds directly into the next.
Foundations: How a Bike Works
BeginnerUnderstand every major system on a bicycle, learn the correct names for parts, and gain confidence handling basic tools safely before touching a real build.
▸ Study plan for this stage
Pace: 8–10 weeks total. Weeks 1–5: Zinn & the Art of Road Bike Maintenance — read ~20–25 pages/day, focusing on one system per session (drivetrain, braking, wheels, steering, frame). Weeks 6–10: The Bicycling Guide to Complete Bicycle Maintenance & Repair — read ~15–20 pages/day, using Downs' broader syst
- Bicycle anatomy & nomenclature: correctly naming every major component (frame, fork, headset, bottom bracket, cassette, derailleur, caliper, lever, hub, rim, tire, saddle, seatpost, stem, handlebar) as introduced across both Zinn and Downs
- How the drivetrain works as a system: pedaling force travels from crankset → chain → cassette/freewheel → rear hub, and how front/rear derailleurs shift the chain across gears (covered in depth in Zinn's drivetrain chapters and reinforced by Downs)
- Braking systems: how rim brakes (caliper, cantilever, V-brake) and the basics of cable-actuated disc brakes convert lever force into stopping power, per both authors' brake chapters
- Wheel anatomy and function: the relationship between hub, spokes, nipples, and rim; how tension keeps a wheel true; tire/tube/valve types as explained in Zinn's wheel chapters and Downs' complementary coverage
- Steering and contact points: how the headset, stem, and handlebar interact; saddle/seatpost fit basics — grounding the reader in the parts they touch every ride
- Tool identification and safe handling: essential workshop tools (hex/Allen keys, cone wrenches, cable cutters, chain checker, spoke wrench, torque wrench) and safe workshop practices as outlined in both books' introductory tool sections
- Cable and housing systems: how brake and shift cables transmit force, the role of housing, and why cable condition affects every system — a thread running through both Zinn and Downs
- Preventive maintenance mindset: reading both authors' introductory philosophy sections to understand that regular inspection, cleaning, and lubrication prevent most mechanical failures
- After reading Zinn's drivetrain chapters, can you trace the exact path of power from the rider's foot to the rear wheel, naming every component the force passes through?
- What is the difference between a cassette and a freewheel, and why does it matter when choosing a removal tool — as explained by Downs?
- How does a derailleur's limit screw differ from its barrel adjuster in function, and what symptom tells you which one needs adjustment (per Zinn)?
- What are the three main spoke lacing patterns described in the wheel chapters, and how does spoke tension relate to wheel trueness?
- According to both authors' tool sections, which tools are considered absolute minimum for a home workshop, and which are 'nice to have' for road-specific work?
- What routine checks should a rider perform before every ride, based on the pre-ride inspection guidance in Downs' maintenance overview?
- Part identification drill: lay a bicycle on a workstand (or a friend's bike on the floor), open Zinn to the exploded diagrams, and physically touch and name every component listed — repeat until you can do it without looking
- Tool matching exercise: gather or photograph the tools in your kit, then cross-reference them against the tool lists in both Zinn's introduction and Downs' opening chapter, noting any gaps in your kit
- Cable inspection walk-through: using Downs' cable chapter as a guide, inspect all brake and shift cables and housing on a real bike for fraying, kinking, and corrosion — document findings in a notebook without making any repairs yet
- Wheel-truing observation: follow Zinn's wheel chapter step-by-step on a removed wheel, using a spoke wrench and truing stand (or fork dropout as a gauge) — focus on understanding cause and effect of nipple turns before trying to achieve perfection
- Pre-ride checklist creation: synthesize the inspection guidance from both Downs' maintenance overview and Zinn's safety sections into a single one-page personal checklist (ABC Quick Check: Air, Brakes, Chain/Cranks) that you laminate for your workshop
- Terminology self-quiz: after finishing both books' foundational chapters, cover the labels on a bicycle diagram and write in the correct names from memory, then score yourself against the glossaries provided by both Zinn and Downs
Next up: ">Mastering part names, system logic, and safe tool use from Zinn and Downs gives the reader the vocabulary and mechanical intuition needed to follow step-by-step repair procedures in the next stage without getting lost in unfamiliar terminology or unsafe habits.

The single most widely used beginner-to-intermediate bicycle maintenance bible. Reading it first gives you a complete mental map of every system — drivetrain, brakes, wheels, headset — and the vocabulary you'll need for every book that follows.

A highly visual, step-by-step companion that reinforces Zinn's concepts with clear photography. Reading it second cements the vocabulary with pictures and introduces the idea of a logical repair workflow.
Hands-On Maintenance: Keeping a Bike Running
BeginnerPerform all routine maintenance tasks — cleaning, lubing, cable replacement, brake adjustment, and basic wheel truing — confidently and independently.
▸ Study plan for this stage
Pace: 4–5 weeks, ~20–25 pages/day; read each chapter once for overview, then re-read the relevant section immediately before attempting the corresponding hands-on exercise. Dedicate at least two weekend sessions (2–3 hours each) purely to working on a real bike with the book open beside you.
- Bike anatomy & part identification — learning the correct names and functions of every major component as laid out in Sidwells' visual reference sections, so you can diagnose problems accurately
- Cleaning workflow — Sidwells' step-by-step degreasing and washing sequence for the drivetrain, frame, and contact points, and why cleanliness is the foundation of all other maintenance
- Lubrication logic — understanding which lubricant type (wet, dry, grease) goes where, how much to apply, and how over- or under-lubing causes wear, as detailed in the lubing chapters
- Cable systems — how brake and gear cables are routed, tensioned, and anchored; recognising cable stretch, fraying, and housing wear; following Sidwells' replacement procedures for both types
- Brake adjustment — setting pad toe-in and pad height for rim brakes, and lever reach; understanding the relationship between cable tension and stopping power as Sidwells demonstrates
- Gear indexing & derailleur basics — using barrel adjusters, limit screws, and cable tension to achieve crisp shifting across the cassette and chainrings, following Sidwells' indexed-shifting tuning sequence
- Wheel truing fundamentals — reading spoke tension, identifying lateral and radial hops, and making incremental spoke-nipple corrections with a truing stand or in-frame method as shown in Sidwells
- Preventive maintenance scheduling — using Sidwells' maintenance interval guidance to build a personal service checklist so problems are caught before they become failures
- After reading Sidwells, can you name every major drivetrain component and explain what happens mechanically when you shift gears?
- What is the correct order of operations for a full drivetrain clean, and why must degreasing happen before lubrication?
- How do you diagnose whether a braking problem is caused by cable tension, pad wear, pad alignment, or rim contamination — and what does Sidwells say to check first?
- Walk through the complete procedure for replacing a snapped or frayed rear derailleur cable, including housing, ferrules, and barrel-adjuster setup.
- A wheel has a lateral wobble of about 4 mm at one spot. Using Sidwells' truing method, which spokes do you adjust, in which direction, and by how much per turn?
- How would you build a personal maintenance schedule for a bike ridden 100 miles per week, drawing on the service intervals Sidwells recommends?
- Full strip-and-clean session: remove the chain, cassette, and chainrings; degrease each part individually; re-lube following Sidwells' lubricant-type guide; reinstall and check shifting — document every step with photos
- Cable replacement drill: replace both the front brake cable and the rear derailleur cable on a real bike (or a donor bike), using Sidwells' procedures; time yourself, then repeat until the process feels fluent and takes under 20 minutes each
- Brake setup from scratch: loosen both brake cables completely and re-adjust pads for correct toe-in and height, then re-tension cables to achieve firm lever feel with 2–3 finger-widths of travel, referencing Sidwells' brake chapters throughout
- Wheel truing practice: deliberately detension 2–3 spokes on a spare wheel to introduce a wobble, then use the in-frame method (or a truing stand) to bring it within 0.5 mm of true, following Sidwells' spoke-adjustment sequence
- Maintenance checklist creation: using Sidwells' service-interval tables, build a written checklist organised by frequency (every ride, monthly, every 500 miles, annually) and laminate or save it as a phone note for real use
- Timed fault-finding challenge: have a friend introduce three hidden faults (e.g., misaligned brake pad, slack gear cable, under-lubed chain) and use Sidwells as your reference to diagnose and fix all three within one hour
Next up: Mastering routine maintenance on a functioning bike builds the mechanical intuition and tool confidence needed to tackle the deeper disassembly, component overhaul, and restoration work that comes next — where parts are worn, corroded, or unknown-spec rather than simply out of adjustment.

A practical, task-oriented manual organized by job rather than by component, which trains you to think like a mechanic diagnosing a problem. Its concise format is ideal for taking to the workbench.
Full Strip & Rebuild: Advanced Mechanics
IntermediateCompletely disassemble and reassemble a bicycle from the frame up, including bottom brackets, headsets, hubs, and wheel building, with professional-level precision.
▸ Study plan for this stage
Pace: 10–14 weeks total. Weeks 1–4: "The Art of Wheelbuilding" by Gerd Schraner (~20–25 pages/day, reading slowly and re-reading technical sections). Weeks 5–14: "Barnett's Manual" by John Barnett (~25–30 pages/day, working chapter-by-chapter alongside a real bicycle on the stand).
- Spoke tension, stress relief, and the physics of a tensioned wheel as described in Schraner's Art of Wheelbuilding — understanding why a wheel fails before learning to build one
- Lacing patterns (2-cross, 3-cross, radial, mixed) and when each is appropriate for rim type, hub flange geometry, and intended use, per Schraner
- Truing, dishing, and stress-relieving a wheel to professional tolerances using a truing stand, dish stick, and tension meter as detailed by Schraner
- Bottom bracket systems (threaded, press-fit, Italian, BSA) — installation, facing, and torque specs as covered in Barnett's Manual
- Headset standards (threaded, threadless, integrated, semi-integrated) — crown race seating, bearing preload, and stack height adjustment per Barnett's Manual
- Hub overhaul and bearing adjustment (cup-and-cone vs. cartridge) for both front and rear hubs, including freehub body service, as detailed in Barnett's Manual
- Complete drivetrain disassembly and reassembly — bottom bracket, crankset, chain line, and derailleur alignment — with professional torque and indexing precision from Barnett's Manual
- Frame preparation: chasing and facing threads, reaming the head tube, and checking alignment before any component is installed, as outlined in Barnett's Manual
- According to Schraner, what is spoke stress relief, why is it critical, and at what stage of the build should it be performed?
- Using Schraner's framework, how do you calculate or select spoke length for a given hub flange diameter, spoke hole count, and rim ERD?
- Per Barnett's Manual, what are the key differences between BSA, Italian, and press-fit bottom bracket shells, and how does each affect installation procedure and torque requirements?
- How does Barnett's Manual describe the correct procedure for seating a crown race and setting headset bearing preload on a threadless system without over-tightening?
- What does Barnett's Manual specify as the correct sequence for a full frame-up build — which components must be installed and adjusted before others, and why does order matter?
- After completing a wheel build following Schraner's method, how do you verify that dish, lateral true, radial true, and spoke tension are all within professional tolerances simultaneously?
- Wheel build from scratch (x2): Using Schraner's lacing and tensioning instructions, build one rear wheel (3-cross) and one front wheel (radial or 2-cross). Measure spoke tension with a tensiometer and verify dish with a dish stick before the first ride.
- Spoke length calculation drill: Before building each wheel, manually calculate spoke lengths using the formula and hub/rim measurements outlined by Schraner. Verify against a spoke calculator — aim for zero discrepancy.
- Full strip to bare frame: Remove every component from a complete bicycle — headset, bottom bracket, hubs, crankset, derailleurs — documenting each step with photos and torque values as a reference against Barnett's Manual chapters.
- Frame preparation practice: Using Barnett's Manual as a guide, face and chase the bottom bracket shell, ream the head tube, and face the fork crown on a donor frame. Inspect threads before and after with a thread gauge.
- Timed reassembly challenge: Reassemble the fully stripped bicycle from the bare frame up, consulting Barnett's Manual for torque specs and sequences. Log every torque value applied and compare to the manual's specifications.
- Fault-finding exercise: After a complete build, deliberately introduce three subtle faults (e.g., slight dish error, loose headset preload, under-tensioned spokes on one side) and practice diagnosing each using only the diagnostic criteria from Schraner and Barnett's Manual.
Next up: Mastering full strip-and-rebuild mechanics and wheel building to professional tolerances gives the reader the complete mechanical foundation needed to advance into specialized topics such as suspension systems, custom fitting, or performance-oriented component selection and tuning.
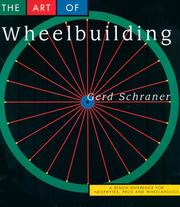
Wheel building is the most skill-intensive single task in a full rebuild. Schraner's short, focused masterclass belongs here — after you understand components but before you attempt a restoration — because a true rebuild demands hand-built wheels.
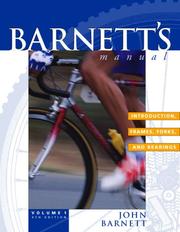
The professional shop reference used in bicycle mechanic certification courses. At this stage you are ready for its depth: torque specs, bearing preload theory, and component compatibility charts that turn a competent hobbyist into a true builder.
Restoration Craft: Neglected to Lovely
ExpertAssess, strip, clean, refinish, and authentically restore a neglected bicycle — including sourcing period-correct parts, repainting, and final show-quality tuning.
▸ Study plan for this stage
Pace: 3–4 weeks, ~20–25 pages/day — Herlihy's text is dense with historical detail, so allow extra time to cross-reference era-specific components, manufacturer histories, and period photographs that directly inform authentic restoration decisions.
- Evolutionary bicycle taxonomy: understanding how frame geometry, materials, and drivetrain configurations changed decade-by-decade so a restorer can accurately date and classify a neglected machine
- Period-correct component identification: using Herlihy's manufacturer histories and patent records to distinguish original parts from later replacements or incorrect substitutions
- Material and finish history: recognizing era-appropriate paint schemes, lining styles, nickel vs. chrome plating timelines, and decal conventions as documented through Herlihy's photographic and archival evidence
- Provenance research methodology: leveraging the bibliographic apparatus, trade-catalog references, and institutional sources Herlihy cites to authenticate a bicycle's origin and spec sheet
- The collector's standard of authenticity: distinguishing a sympathetic conservation approach from a full show-quality restoration, informed by Herlihy's treatment of surviving museum-grade examples
- Sourcing strategy grounded in lineage: using knowledge of which manufacturers produced which components in which eras (as mapped in Herlihy) to target correct NOS, reproduction, or donor-bike parts
- Structural integrity assessment through historical context: understanding which design generations were prone to specific failure modes (fork crown cracking, bottom-bracket thread standards, spoke gauge changes) based on the engineering transitions Herlihy traces
- Show-quality tuning philosophy: reconciling mechanical perfection with period authenticity — knowing when a modern lubricant or fastener is acceptable and when it breaks the restoration's integrity
- Given a bicycle of unknown age, which physical and documentary clues drawn from Herlihy's historical timeline would you use to narrow its manufacture date to within a five-year window?
- How does Herlihy's account of the late-19th-century component standardization wars (threading, axle widths, spoke gauges) inform your decision about which replacement parts are period-correct for a specific machine?
- Herlihy documents the rise and fall of several major manufacturers — how would you use that corporate history to assess whether a part bearing a particular brand stamp is original to a bicycle or a later dealer substitution?
- What finishing conventions (paint color, coach-lining, plating type) does Herlihy's photographic and archival evidence suggest for a bicycle from a specific era, and how would you replicate them at show quality?
- How does Herlihy's treatment of the bicycle's cultural and commercial peak periods help you set a realistic authenticity benchmark — i.e., what does 'as-delivered' actually mean for a machine from that era?
- Using the sourcing logic implied by Herlihy's manufacturer and patent histories, outline a procurement plan for three missing components on a notional pre-1910 roadster.
- Dating drill: Select five bicycles from different eras depicted in Herlihy's photographs. For each, write a one-page condition/dating report listing every visual clue (lug style, fork crown, brake type, saddle, finish) that anchors it to a specific decade — practice the same assessment on your project bike.
- Component authenticity audit: Using Herlihy's manufacturer timelines and patent dates, create a spreadsheet for your project bicycle listing every component, its likely manufacture date range, its probable originality status (original / period-correct replacement / incorrect), and a sourcing note.
- Finish research dossier: Compile a restoration brief for your bicycle's paint and plating by extracting every relevant color, lining, and plating reference from Herlihy that applies to its era and marque — include period catalog images or museum-photo comparisons where possible.
- Provenance deep-dive: Follow Herlihy's bibliographic trail (trade journals, patent filings, institutional collections he references) to locate at least two primary or archival sources outside the book that corroborate or refine your bicycle's specification.
- Disassembly & documentation session: Before touching a fastener, photograph every part from multiple angles; then fully disassemble the bicycle, tagging each component with its Herlihy-informed authenticity status. Write a prioritized restoration plan distinguishing conservation tasks from full-refinish tasks.
- Show-quality mock inspection: Using the standards implied by Herlihy's descriptions of museum and concours examples, conduct a formal walk-around of your restored (or in-progress) bicycle with a checklist covering finish, plating, decals, mechanical function, and period-correctness — score each category and identify the top three remaining gaps.
Next up: Mastering the historical and authenticating framework in Herlihy gives the restorer the 'why' behind every material and component choice, setting the stage for a next-level stage focused on advanced mechanical overhaul techniques and workshop practice — where that period-correct knowledge is translated into precise, hands-on execution.

Understanding the historical context of different eras and manufacturers is essential for authentic restoration decisions — what parts belong on what bike, and why. This is the cultural and technical reference that informs every sourcing choice.
A focused guide to identifying, valuing, and restoring classic bicycles. It covers period-correct components, finishing techniques, and the collector's eye for detail that separates a true restoration from a mere repair.
Discussion
Keep reading
Paths that share books, cover the same subject, or open a related topic.