Become a plumber: a high-pay, AI-proof trade
This curriculum takes a career-changer from zero plumbing knowledge to a well-rounded, business-ready tradesperson. It moves through four tightly sequenced stages: building physical intuition about water and pipe systems, mastering the hands-on trade skills and code that apprentices and journeymen must know, understanding the legal and licensing landscape, and finally running a profitable plumbing business — the layer that separates a skilled technician from a sustainable career.
Foundations: How Water and Pipe Systems Work
BeginnerUnderstand the core physics of water pressure, drainage, venting, and basic pipe materials before picking up a wrench — so hands-on learning has a mental model to attach to.
▸ Study plan for this stage
Pace: 3–4 weeks, ~20–25 pages/day — read Plumbing Complete by Rex Cauldwell cover-to-cover in order, spending extra time on the early chapters covering codes, pressure, and pipe materials before moving into fixture-specific content.
- Water pressure and flow: how PSI, pipe diameter, and elevation interact to move water through a supply system
- The DWV system (Drain-Waste-Vent): how gravity drainage, trap seals, and venting work together to remove waste and block sewer gases
- Pipe materials and their properties: differences between copper, CPVC, PEX, PVC, and ABS — when each is used and why
- Fittings and connections: how elbows, tees, couplings, and reducers direct flow, and the logic behind choosing the right fitting
- The role of building and plumbing codes: why code exists, how Cauldwell frames code compliance as a baseline for safe, inspectable work
- Rough-in vs. finish plumbing: the two-phase structure of a plumbing job and what decisions must be made before walls close
- Water hammer and pressure regulation: causes of hydraulic shock and how pressure-reducing valves and air chambers address it
- Slope and gravity: why drain lines must maintain a consistent fall (typically 1/4 inch per foot) and what happens when they don't
- In your own words, explain how a P-trap prevents sewer gas from entering a home — and what role the vent stack plays in keeping that trap seal intact.
- What are the key differences between PEX, CPVC, and copper for supply lines? Under what conditions would Cauldwell favor one over the others?
- Why does a drain line that is sloped too steeply cause problems, and what is the generally recommended fall per foot for horizontal drain runs?
- What is water hammer, what causes it, and what are two ways a plumber can prevent or correct it?
- Describe the difference between a sanitary tee and a wye fitting — when is each appropriate in a DWV system?
- Why must every fixture trap be vented, and what symptom tells you a trap has lost its seal due to siphoning?
- Sketch a complete single-bathroom DWV diagram from memory — include the toilet, sink, tub, trap locations, vent stack, and the connection to the main drain. Label every fitting type and the required slope on horizontal runs.
- Visit a hardware store or plumbing supply house and handle samples of copper, PEX, CPVC, PVC, and ABS pipe. Note the weight, flexibility, and markings on each. Photograph them and write a one-paragraph comparison referencing Cauldwell's descriptions.
- Locate the main water shut-off and the water meter in your home or a friend's home. Trace the supply lines as far as you can see them and identify the pipe material used. Note any pressure-reducing valve or expansion tank present.
- Fill a bucket from a tap and time the flow for 30 seconds to estimate GPM (gallons per minute). Then partially close a downstream valve and repeat — observe and write down how restricting flow affects pressure at the outlet, connecting the result to Cauldwell's pressure/flow discussion.
- Create a two-column reference card: on one side list every pipe material covered in Plumbing Complete with its max temperature rating, typical use case, and joining method; on the other side list the fittings associated with each material.
- After finishing the book, write a one-page 'mental model summary' in plain language explaining how supply water enters a building, gets used at a fixture, and exits through the DWV system — as if explaining it to someone who has never thought about plumbing before.
Next up: Mastering these physics and materials fundamentals from Cauldwell gives you the mental framework to understand *why* each tool, technique, and code requirement in hands-on plumbing work exists — so the next stage's practical skill-building has solid theory to anchor every cut, joint, and connection.
A plain-language, heavily illustrated primer from a master tradesman that explains how residential water supply, drain-waste-vent (DWV), and fixture systems fit together — the perfect first mental map for a complete beginner.

Cauldwell's fuller follow-up expands every system covered in the primer with real installation sequences and material choices, bridging conceptual understanding to actual trade tasks before the reader enters an apprenticeship.
Core Trade Skills: Hands-On Techniques and Materials
BeginnerLearn the practical skills of cutting, joining, and installing copper, PVC, PEX, and cast-iron pipe — the bread-and-butter work of an apprentice plumber on the job site.
▸ Study plan for this stage
Pace: 6–8 weeks total. Week 1–4: Read "Plumbing 1-2-3" cover-to-cover at ~20–25 pages/day, pausing at each pipe-material chapter to attempt the related hands-on exercise before moving on. Week 5–8: Read "Audel Plumber's Pocket Manual" at ~15–20 pages/day, using it as a dense reference layer on top of what
- Pipe material identification and selection: knowing when to use copper, PVC, CPVC, PEX, or cast iron based on application, pressure, and code (introduced visually in Plumbing 1-2-3, reinforced with specs in Audel)
- Cutting techniques: using a tubing cutter on copper, a hacksaw/miter box or power saw on PVC, a PEX cutter on PEX, and a snap cutter or angle grinder on cast iron — each tool and its correct technique covered in both books
- Joining methods by material: soldering (sweating) copper fittings, solvent-welding PVC/CPVC with primer and cement, crimping or clamp-ring connections for PEX, and no-hub couplings or lead-and-oakum joints for cast iron
- Reading and applying pipe fittings: elbows, tees, couplings, reducers, unions, and adapters — Plumbing 1-2-3 provides photo-rich identification; Audel provides dimensional and pressure tables
- Measuring and planning a pipe run: calculating offsets, accounting for fitting allowances (make-up length), and dry-fitting before final assembly — a workflow emphasized throughout Plumbing 1-2-3's project chapters
- Slope and drainage principles: maintaining the correct fall-per-foot on DWV (drain-waste-vent) lines and understanding why cast iron is still preferred for noise reduction in multi-story buildings (Audel covers code minimums)
- Shutoff valves, supply stops, and isolation: types of valves (ball, gate, globe), their installation, and when each is appropriate — covered in both books as part of fixture rough-in
- Safety and code basics on the job site: torch safety for soldering copper, solvent fume ventilation for PVC, and the importance of pressure-testing completed runs before closing walls
- After reading Plumbing 1-2-3, can you walk through every step of sweating a 3/4-inch copper elbow — from cutting and deburring to applying flux, heating, and feeding solder — without referring to the book?
- What is the correct primer-and-cement procedure for a PVC solvent-weld joint, and why must primer be applied before cement? (Audel's pocket manual gives the chemical rationale.)
- How do you calculate the cut length of a pipe segment when the fitting's make-up (socket depth) must be subtracted from the face-to-face measurement? Work through a sample offset using numbers from your own practice cuts.
- What are the key differences between a crimp-ring PEX connection and a clamp-ring (Oetiker) PEX connection, and what tool is required for each? Where does Plumbing 1-2-3 illustrate these, and what does Audel add about pressure ratings?
- When installing a cast-iron no-hub coupling, what torque specification and band-clamp sequence does Audel's pocket manual recommend, and how does this differ from the DIY-oriented guidance in Plumbing 1-2-3?
- What minimum slope (fall per foot) is required for a 3-inch horizontal DWV drain line, and what happens — both physically and from a code standpoint — if the slope is too steep or too shallow?
- Copper sweat station: Buy a 10-foot stick of 1/2-inch copper and a bag of assorted fittings. Practice cutting 10 segments to exact measured lengths, deburring every end, fluxing, and soldering each joint. Inspect each joint for a full 360° solder bead. Use Plumbing 1-2-3's step-by-step photos as your checklist.
- PVC dry-fit and glue-up: Lay out a simple 'U'-shaped drain run on a workbench using 1-1/2-inch PVC, two 90° elbows, and a tee. Dry-fit and mark alignment, then disassemble and solvent-weld with primer and cement, reassembling within the 30-second working time. Check alignment marks after cure.
- PEX crimp practice: Using a length of 1/2-inch PEX, a crimp tool, and brass fittings, make five crimp connections. Use a go/no-go gauge (as described in Plumbing 1-2-3) to verify each ring is properly seated. Try to pull the fitting off by hand to feel the holding strength.
- Measurement and offset calculation drill: Using the make-up/fitting-allowance tables in Audel's pocket manual, calculate the cut lengths for a 45° offset that must travel 12 inches horizontally and 6 inches vertically. Cut the pipes to your calculated lengths and dry-fit to verify the math.
- Valve identification and installation: Obtain a ball valve and a gate valve (1/2-inch). Solder or thread each onto a short copper nipple, cycle them open and closed 20 times, and note the difference in flow feel and handle travel. Cross-reference valve specs in Audel's pocket manual.
- Pressure test simulation: After completing any of the above pipe assemblies, cap all open ends and connect a bicycle pump or low-pressure air source. Brush soapy water over every joint and look for bubbles — replicating the air-test method described in both books before a wall is closed.
Next up: Mastering these hands-on joining and installation techniques gives you the physical vocabulary of the trade, setting the stage for the next level where you will learn how these individual pipe runs connect into complete plumbing systems — including DWV system design, water supply layout, venting theory, and code-compliant fixture rough-in.

A step-by-step, photo-rich guide to the most common residential plumbing tasks; its project-based format mirrors the kind of work a first-year apprentice encounters and builds procedural confidence quickly.
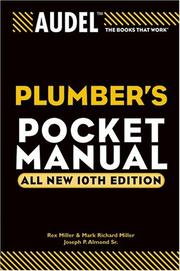
A compact, field-tested reference covering pipe sizing, fittings, tools, and fixture installation that tradespeople carry on the job — reading it now builds the vocabulary needed for code study and on-site problem-solving.
Code, Standards, and the Apprenticeship Path
IntermediateUnderstand the International Plumbing Code (IPC) and Uniform Plumbing Code (UPC) well enough to pass journeyman licensing exams and work legally on permitted jobs.
▸ Study plan for this stage
Pace: 12–16 weeks total. Week 1–5: International Plumbing Code 2003 (IPC) — read ~20–25 pages/day, focusing on Chapters 1–12 systematically, with 2 days per chapter for review and note-taking. Week 6–9: Plumber's Licensing Study Guide by Woodson — read ~15–20 pages/day, treating each chapter as an active
- IPC vs. UPC jurisdiction: understanding which code governs your region and how adoption by local authorities having jurisdiction (AHJ) works
- Pipe sizing and fixture unit calculations: how Drainage Fixture Units (DFUs) and Water Supply Fixture Units (WSFUs) drive system design under both codes
- Drain, Waste, and Vent (DWV) system requirements: trap types, trap-to-vent distances, vent sizing, and prohibited configurations under IPC and UPC
- Water supply system rules: minimum pressure requirements, backflow prevention device selection, cross-connection control, and potable vs. non-potable separation
- Permit, inspection, and plan review process: what triggers a permit, required inspections (rough-in, pressure test, final), and the plumber's legal obligations on a permitted job
- Apprenticeship and licensing structure: the distinction between apprentice, journeyman, and master plumber credentials, required hours, and how the Woodson study guide maps exam content to code sections
- Material and installation standards: approved pipe materials by application (DWV, water supply, gas), joining methods, support spacing, and protection requirements
- Code change cycle and amendments: how the IPC and UPC are updated, why the 2003 IPC and 2024 UPC differ on key points, and how local amendments override base code
- Given a bathroom group with a water closet, lavatory, and bathtub, calculate the total DFUs and determine the minimum drain pipe diameter required under both the IPC and UPC — where do the two codes agree or diverge?
- A customer's building is in a city that has adopted the 2024 UPC with local amendments. The inspector cites a vent configuration that would be legal under the IPC. How do you resolve this conflict, and what documents do you reference?
- What are the minimum trap-to-vent distances for a 1.5-inch fixture drain under the IPC, and how does the UPC's 'critical distance' concept compare?
- List five backflow prevention scenarios (e.g., irrigation system, commercial dishwasher, medical facility) and identify the correct backflow preventer type required by code for each.
- What inspections are legally required between permit issuance and final approval on a new residential rough-in, and what must be accessible or visible at each stage?
- Using the Woodson study guide's practice exams as a benchmark, which three code topic areas most commonly appear on journeyman licensing exams, and which IPC/UPC chapters directly address each?
- Code scavenger hunt: Pick 10 real fixtures from a hardware store catalog, look up each fixture's DFU value in both the IPC 2003 table and the 2024 UPC table, record any differences, and calculate the total load for a hypothetical 3-bathroom house.
- Mock permit application: Draft a written scope of work and materials list for a bathroom addition as if submitting for a permit, citing the specific IPC or UPC section that authorizes each design choice.
- Timed Woodson practice exams: Complete each chapter's practice questions under timed conditions (1 minute per question), score yourself, then look up every wrong answer in the corresponding IPC or UPC section before moving on.
- Vent system sketch drill: Hand-draw the DWV riser diagram for a two-story house with a kitchen, two bathrooms, and a laundry room — label every vent, trap, cleanout, and pipe size, then verify each label against the code tables in both the IPC and UPC.
- Side-by-side code comparison log: Create a two-column reference sheet (IPC | UPC) for at least 15 key rules (trap seal depth, minimum drain slope, water heater relief valve discharge, etc.), noting the exact section number and any discrepancy between the two codes.
- Field inspection simulation: Visit a permitted residential construction site (with permission) or use online rough-in photos, identify at least five code-compliance items, and write a brief 'inspection report' citing the relevant IPC or UPC section for each finding.
Next up: Mastering the IPC, UPC, and licensing framework gives you the legal and technical vocabulary to interpret blueprints and engineered drawings accurately, which is the foundation for the next stage focused on reading construction documents and executing complex commercial or multi-family plumbing installations.
The primary model code adopted by most U.S. jurisdictions — reading it cover-to-cover (not just referencing it) is the single most important step toward passing a licensing exam and understanding inspectors' expectations.
Translates dense code language into exam-ready explanations with practice questions, making it the ideal companion to the IPC for anyone preparing for apprentice, journeyman, or master plumber tests.

The competing model code used heavily in the western U.S. and internationally; reading it after the IPC highlights where jurisdictions differ — critical knowledge for a plumber who may work across state lines.
Business and Career Mastery
ExpertTransition from skilled technician to independent contractor or small-business owner — pricing jobs, managing customers, handling liability, and building a durable trade business.
▸ Study plan for this stage
Pace: 10–12 weeks total: ~3 weeks on "Markup & Profit" (~25 pages/day), ~3 weeks on "The E-Myth Contractor" (~20 pages/day), ~4 weeks on "Contractor's Guide to the Building Code" (~30 pages/day), with 1–2 buffer weeks for review, note consolidation, and completing exercises.
- Markup vs. margin: understanding why markup (not margin) is the correct pricing mechanism for contractors, and how to calculate it accurately using Stone's formulas in 'Markup & Profit'
- Break-even analysis and overhead recovery: identifying all fixed and variable costs so every job price covers overhead and generates true net profit, as taught in 'Markup & Profit'
- The Technician vs. Entrepreneur mindset: Gerber's core distinction in 'The E-Myth Contractor' — working ON the business rather than just IN it as a plumber
- Systems thinking and the franchise prototype: building repeatable, documented processes (estimating, scheduling, customer service) so the business runs without the owner doing everything
- The three business personalities (Technician, Manager, Entrepreneur) and how to balance them as a plumbing contractor per Gerber's framework
- Permit requirements, inspection stages, and code compliance obligations: understanding when permits are required, who is responsible, and how violations create liability, per Hageman's 'Contractor's Guide to the Building Code'
- Plumbing-specific code provisions: pipe sizing, venting, fixture requirements, and water heater installation rules as covered in Hageman — translating code knowledge into accurate bids and compliant work
- Customer and liability management: how code compliance, proper documentation, and business systems together protect the contractor legally and reputationally
- Using Stone's markup formula from 'Markup & Profit', if your annual overhead is $80,000 and your target net profit is 10% on $400,000 in revenue, what markup factor should you apply to direct job costs — and why would using a simple 'margin' percentage undercut your profit?
- According to Gerber in 'The E-Myth Contractor', what is the 'fatal assumption' that most tradespeople make when starting a contracting business, and how does it lead to business failure even for highly skilled plumbers?
- What is the 'franchise prototype' concept from 'The E-Myth Contractor', and how would you apply it to your plumbing business — give two specific examples of systems you would document?
- Under Hageman's 'Contractor's Guide to the Building Code', when is a plumbing permit legally required, who is responsible for obtaining it, and what are the consequences of performing work without one?
- How do the pipe-sizing and venting code requirements covered in Hageman affect how you write a bid — what line items or contingencies should a compliant plumbing estimate always include?
- How do the three books work together as a business framework: how does Stone's pricing system, Gerber's systems thinking, and Hageman's code knowledge each protect your profit margin and reduce business risk?
- Markup & Profit pricing audit: List every overhead expense in your current or hypothetical plumbing operation (truck, insurance, tools, phone, admin time), calculate your true annual overhead, then use Stone's markup formula to derive your markup factor and reprice three past or sample jobs — compare the result to what you would have charged using a naive 'cost-plus-20%' approach.
- Build a one-page Job Estimate Template grounded in Stone's methodology: include material costs, labor hours × burdened labor rate, subcontractor costs, and a clearly applied markup factor — use it to price a water heater replacement, a bathroom rough-in, and a drain re-pipe.
- E-Myth business system design: Following Gerber's franchise-prototype principle, write three Standard Operating Procedures (SOPs) for your plumbing business — one for the customer inquiry/quote process, one for job site startup, and one for invoice and follow-up — each should be detailed enough that a non-plumber office manager could execute the non-technical steps.
- Org chart and role audit: Draw the organizational chart Gerber recommends even if you are a solo operator — label every role (Owner, Sales, Field Technician, Bookkeeper, Scheduler) and write one paragraph on which roles you currently fill yourself and which you would hire or outsource first as you grow.
- Code compliance checklist: Using Hageman's 'Contractor's Guide to the Building Code', build a job-specific permit and inspection checklist for a complete bathroom addition — include permit application triggers, required inspection stages, and the specific plumbing code items an inspector will check (venting, trap distances, fixture units, water heater T&P relief).
- Risk and liability scenario drill: Write out three realistic scenarios — (1) a customer asks you to skip the permit to save money, (2) an inspector flags a venting violation after rough-in, (3) a customer disputes your invoice claiming the price was not agreed upon — and for each scenario write your response procedure, referencing the relevant guidance from Hageman (code/permit obligations) and Ge
Next up: Mastering pricing, business systems, and code compliance in this stage gives the reader the professional and legal foundation needed to confidently pursue advanced specializations, licensing upgrades, or leadership roles — the natural next step in a plumbing curriculum focused on master-level trade expertise or business scaling.

The canonical text on construction business pricing; it teaches contractors how to calculate true overhead, set profitable markups, and stop undercharging — the single biggest financial mistake new plumbing businesses make.
Addresses the universal trap of the skilled tradesperson who starts a business but stays stuck doing all the technical work; its systems-thinking framework is directly applicable to building a scalable plumbing operation.
Broadens code literacy beyond plumbing to the full building code ecosystem — essential for a plumber running their own jobs, pulling permits, and coordinating with general contractors and inspectors.
Discussion
Keep reading
Paths that share books, cover the same subject, or open a related topic.