Best Books on Airbrushing, in Reading Order
This curriculum takes a complete beginner from zero airbrush knowledge to confident, project-ready mastery across four progressive stages. Each stage builds on the last — starting with tool selection and basic mechanics, moving through paint and pressure control, then masking and freehand technique, and finally tackling real-world projects across popular disciplines like illustration, automotive, and fine art.
Foundations: Choosing & Understanding Your Airbrush
BeginnerUnderstand how airbrushes work, the differences between types (gravity vs. siphon, single vs. double-action), how to choose the right tool, and how to set up and maintain it safely.
▸ Study plan for this stage
Pace: 4–5 weeks, ~20–25 pages/day. Start with Curtis's foundational chapters (weeks 1–2), then move to Vero's technical deep-dives (weeks 2–3), with overlap and review in week 4–5 for hands-on application.
- How airbrushes atomize paint: the mechanics of air pressure, fluid flow, and spray pattern formation
- Gravity-feed vs. siphon-feed systems: structural differences, advantages, disadvantages, and appropriate use cases
- Single-action vs. double-action triggers: control mechanisms and how they affect spray precision and workflow
- Airbrush anatomy and components: needle, nozzle, air cap, fluid cup, and how each part contributes to performance
- Selecting the right airbrush: matching tool specifications to your intended medium (acrylic, oil, watercolor) and project type
- Setup procedures: assembly, calibration, pressure settings, and safety protocols before first use
- Maintenance and cleaning: preventing clogs, preserving needle integrity, and extending equipment lifespan
- Common beginner mistakes and troubleshooting: recognizing and correcting spray issues, leaks, and inconsistent output
- Explain the fundamental difference between how gravity-feed and siphon-feed airbrushes deliver paint, and describe one scenario where you would choose each type.
- What is the functional difference between a single-action and double-action airbrush trigger, and how does this affect your control over spray width and paint flow?
- Identify and describe the purpose of at least five key components of an airbrush (e.g., needle, nozzle, air cap, fluid cup, trigger mechanism).
- Walk through the complete setup and pressure-testing procedure for an airbrush before using it for the first time, including safety checks.
- Given a specific project (e.g., detailed illustration, broad background coverage, fine detail work), explain which airbrush type and action style you would select and why.
- Describe the step-by-step cleaning and maintenance routine you would perform after each use and after extended storage to prevent damage.
- Compare and contrast: Create a detailed chart comparing gravity-feed vs. siphon-feed airbrushes across dimensions like cost, control, maintenance, and best-use scenarios. Reference specific examples from Curtis and Vero.
- Component identification: Obtain or examine an actual airbrush (or high-quality photos/diagrams from the books). Label each major component and write a 2–3 sentence description of its function based on what you've read.
- Setup simulation: Follow the complete setup procedure from the books step-by-step, either with an actual airbrush or as a detailed written walkthrough. Document each step and identify all safety checkpoints.
- Selection exercise: Read 3–4 different project briefs (e.g., 'paint fine facial details on a miniature,' 'create a smooth gradient background,' 'airbrush a t-shirt design'). For each, justify which airbrush type and action style you would choose based on the books' guidance.
- Maintenance log: Create a detailed maintenance checklist based on Curtis and Vero's recommendations. Practice or simulate the cleaning routine after a hypothetical painting session.
- Troubleshooting case studies: Work through 4–5 common problems described in the books (e.g., spray pattern issues, fluid leaks, needle sticking). For each, identify the likely cause and the recommended fix.
Next up: Mastering airbrush mechanics and selection establishes the technical foundation needed to move into paint preparation, mixing, and the actual spraying techniques that will form the core of your practical airbrushing skill.

A classic, comprehensive introduction to airbrush anatomy, types, and selection — the ideal first read to build vocabulary and demystify the tool before touching paint.

Expands on tool mechanics with detailed coverage of compressors, air pressure fundamentals, and studio setup, giving beginners a thorough technical grounding right after learning the basics.
Control: Air Pressure, Paint Thinning & Basic Marks
BeginnerLearn how to correctly thin paints for airbrushing, dial in air pressure for different effects, avoid common problems (tip dry, spattering, blowback), and produce consistent basic marks and gradients.
▸ Study plan for this stage
Pace: 4–5 weeks total. Week 1–2: Read "Airbrushing for Beginners" by Pamela Shanteau cover-to-cover (~20–25 pages/day), pausing after each chapter to practice at the airbrush. Week 3–5: Read "The Complete Book of Airbrushing" by John Morley (~15–20 pages/day), cross-referencing Shanteau's foundational gui
- Paint consistency and thinning ratios: understanding the 'skim milk' viscosity benchmark introduced in Shanteau and how Morley expands on medium-specific thinning (acrylics, enamels, inks)
- Air pressure ranges and their effects: low PSI (5–15) for fine detail and high PSI (20–35) for broader coverage, as demonstrated progressively across both books
- The trigger/needle relationship: how double-action control of air and paint flow simultaneously governs line width and paint volume, a core mechanical concept in Shanteau
- Distance from surface: how holding distance interacts with pressure and paint flow to produce hard vs. soft edges, covered practically in both Shanteau and Morley
- Tip dry causes and prevention: paint drying at the needle tip due to over-thinning, low humidity, or pausing — and the remedies both authors recommend
- Spattering and blowback troubleshooting: diagnosing whether the root cause is pressure, viscosity, dirty needle, or faulty technique using the systematic checks in Morley
- Basic mark vocabulary: dots, lines, dagger strokes, and fades — the foundational marks Shanteau uses as building-block exercises throughout her beginner curriculum
- Consistent gradients: achieving smooth tonal transitions by combining pressure, distance, and trigger control, a technique reinforced with step-by-step examples in Morley
- According to Shanteau, what is the correct paint-to-thinner ratio for a water-based acrylic, and what visual or physical test can you use to confirm it before loading the airbrush?
- How does increasing air pressure while keeping paint flow constant change the appearance of a sprayed line, and which book provides the clearest pressure-chart reference for this?
- What are the three most common causes of tip dry identified across Shanteau and Morley, and what is the corrective action for each?
- Describe the hand motion and trigger technique Shanteau recommends for producing a consistent dagger stroke from thick to thin.
- How does Morley differentiate the troubleshooting approach for spattering caused by incorrect viscosity versus spattering caused by a partially blocked needle?
- What combination of PSI, distance, and trigger pull does Morley recommend as a starting point for laying down a smooth, even gradient on illustration board?
- Thinning ladder drill (Shanteau-guided): Mix the same acrylic paint at four different ratios (1:1, 1:2, 1:3, 1:4 paint-to-water). Spray a test card at each ratio at 15 PSI and document the results — note texture, coverage, and any spattering. Identify which ratio matches Shanteau's 'skim milk' standard.
- Pressure sweep exercise: On a single sheet of paper, spray a horizontal band of the same paint at 8, 15, 25, and 35 PSI without changing distance or trigger pull. Label each band and compare line quality, overspray, and edge definition as described in both books.
- Basic marks practice sheet (Shanteau sequence): Dedicate one full session to reproducing Shanteau's core mark exercises — dots of graduating size, straight lines of even width, tapered dagger strokes, and open-ended fades — filling at least two full A4 sheets before moving to Morley.
- Gradient card series (Morley method): Produce five gradient cards on illustration board, each attempting a smooth black-to-white fade. Vary one variable per card (pressure, distance, trigger speed) while holding the others constant. Annotate each card with your settings to build a personal reference.
- Troubleshooting log: Deliberately induce tip dry (let the airbrush sit loaded for 2 minutes), spattering (use paint that is too thick), and blowback (push trigger back too far at low pressure). Photograph each defect, then apply the fixes from Morley's troubleshooting sections and document what resolved each problem.
- Blind consistency test: Without looking at your pressure gauge, spray ten lines you judge to be identical, then measure their widths with a ruler. Use the variance to calibrate your muscle memory for trigger control, a self-assessment approach consistent with the skill-building philosophy in both Shanteau and Morley.
Next up: Mastering pressure, thinning, and basic marks gives you a reliable, repeatable foundation so that the next stage — which introduces masking, frisket, and stencil work — can be approached with confidence that any imperfections come from masking technique rather than unresolved control issues.
Covers paint types, thinning ratios, and troubleshooting in practical detail, reinforcing and deepening what Shanteau introduces with more media variety and problem-solving guidance.
Technique: Masking, Freehand Control & Rendering
IntermediateMaster both hard-edge masking (frisket, tape, stencils) and freehand soft-edge control, understand how to combine them for complex imagery, and develop smooth blending and rendering skills.
▸ Study plan for this stage
Pace: 4–5 weeks, ~20–25 pages/day with daily practice sessions
- Hard-edge masking techniques: frisket application, removal, and preventing adhesive residue and paint bleed-through
- Tape and stencil masking for geometric and controlled shapes, including registration and layering strategies
- Freehand soft-edge control: finger distance, air pressure modulation, and hand movement for feathering and gradual transitions
- Combining hard and soft masking in a single composition to balance precision with organic blending
- Smooth blending and rendering: wet-on-wet techniques, color layering, and achieving photorealistic gradations
- Pressure and distance relationships: how proximity to the surface and trigger control affect spray pattern and edge quality
- Problem-solving for common masking failures: paint creep, frisket damage, and unintended hard edges
- What are the key differences between frisket, tape, and stencil masking, and when should you use each for different effects?
- How do you prevent paint bleed-under when using frisket or tape, and what is the proper removal technique to avoid surface damage?
- Describe the relationship between airbrush distance, air pressure, and trigger control for achieving soft-edge freehand work.
- How do you layer hard-edge masks and freehand soft-edge work in a single piece without compromising either technique?
- What are the steps for achieving smooth, photorealistic blending and rendering with an airbrush?
- How do you troubleshoot common masking problems such as paint creep, frisket adhesion failure, or unwanted hard edges?
- Practice basic frisket application and removal on scrap material: apply, spray a test color, remove carefully, and inspect for residue or surface damage.
- Create a series of tape-masked geometric shapes (rectangles, circles, angles) with clean, sharp edges to build precision and tape-handling confidence.
- Execute 5–10 freehand soft-edge gradients without masking, focusing on consistent feathering and smooth color transitions at varying distances and pressures.
- Combine hard and soft masking in a single study: mask a geometric background with tape, then freehand soft-edge elements (clouds, shadows, organic shapes) over it.
- Paint a simple object (sphere, cube, or cylinder) using only the airbrush, emphasizing smooth blending and realistic rendering of light and shadow.
- Reproduce a rendering exercise from Airbrush Action 3 that integrates multiple masking and blending techniques, comparing your result to the reference.
Next up: Mastering hard-edge precision and soft-edge control in isolation and combination prepares you to tackle complex, layered compositions where multiple techniques must work seamlessly together in service of photorealistic or stylized imagery.

Focuses heavily on freehand technique and the interplay between masking and open spraying, with clear exercises that build muscle memory for edge control and tonal gradation.
Projects: Applied Airbrushing Across Disciplines
ExpertApply all accumulated skills to real finished projects — illustration, T-shirt art, scale models, and automotive/custom painting — understanding how professionals adapt technique to each surface and medium.
▸ Study plan for this stage
Pace: 4–5 weeks, ~25–30 pages/day with project work interspersed; allocate 2–3 days per major technique before moving to the next section
- Adapting airbrush technique to automotive surfaces: prep, primer selection, and paint adhesion on metal and composite materials
- Creating custom effects on vehicles: flames, fades, graphics, and pearl/metallic finishes using airbrush and masking strategies
- Layering and blending automotive paints for depth and realism, including candy colors and transparent effects
- Troubleshooting common automotive airbrushing problems: orange peel, runs, dust, and adhesion failures
- Integrating hand-painting and detailing with airbrush work for professional-grade custom finishes
- Understanding material compatibility: which airbrush mediums, thinners, and sealers work on automotive substrates
- Speed and efficiency techniques for production-level automotive work without sacrificing quality
- What surface preparation steps are critical before airbrushing on automotive metal, and why does primer selection matter for adhesion?
- How do you create a realistic flame effect on a vehicle using masking and layering, and what common mistakes does Fraser warn against?
- What is the difference between a fade and a gradient in automotive airbrushing, and when would you use each technique?
- How do you troubleshoot orange peel texture in automotive finishes, and what adjustments to air pressure, paint viscosity, or technique prevent it?
- What are the key differences between airbrushing on metal automotive surfaces versus composite or plastic parts, and how does your approach change?
- How do professionals integrate hand-painted details and clear-coating with airbrush work to achieve a finished automotive custom paint job?
- Prepare a practice panel (metal or automotive composite) following Fraser's prep protocol: sand, prime, and test adhesion before committing to a design
- Execute a simple fade or gradient on a test panel using automotive paint, adjusting air pressure and paint flow to achieve smooth transitions without orange peel
- Create a masked flame design on a practice surface, using Fraser's masking techniques and layering approach; photograph the process to compare against the book's examples
- Mix and airbrush a candy color or metallic finish on a test panel, documenting the number of coats and drying time needed for depth and durability
- Paint a small automotive-scale project (motorcycle tank, car hood panel, or custom helmet) applying at least three techniques from the book (e.g., base color, graphic overlay, fade, or effect)
- Document and troubleshoot one finish problem (orange peel, runs, dust, or adhesion issue) on a test panel, then correct it and explain the fix in writing
Next up: This stage transforms you from a skilled airbrush technician into a professional who can execute complete, market-ready custom finishes on real vehicles and surfaces, preparing you to either specialize further in automotive work or branch into other advanced disciplines (illustration, scale modeling, or fine art) with the confidence and problem-solving toolkit to adapt your skills to any substrate
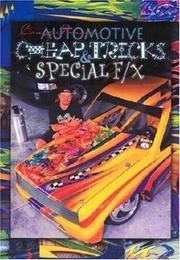
Craig Fraser is one of the most respected names in custom automotive airbrushing; this book translates advanced technique into real vehicle and surface projects, showing professional-level application.
Brings airbrushing into the world of scale models with projects covering weathering, camouflage, and fine detail work — a discipline that demands precise pressure and paint control at small scale.
Discussion
Keep reading
Paths that share books, cover the same subject, or open a related topic.